Last-Minute Scalloped Potatoes

Last-Minute Scalloped Potatoes

sl_scalloped_potatoes_006.jpg

For a decade or more, this has been my go-to potato side dish for summer barbecues all the way to holiday dinners. It’s not so much that this is a secret recipe, but more the fact that no one guesses this begins with frozen diced potatoes — you know, hash browns.

But that’s your secret, right? After you pour the frozen taters into the skillet, you add Parmesan, garlic, and cream, so that elevates the recipe a lot. And you let it bake enough to create a crusty, crispy, cheesy ring around the pan that is delicious along with the warm and gooey interior. Top with a little extra cheese and run under the broiler, or finish it with a layer of buttered bread crumbs that you let cook until golden before serving. This is one of the fabulous sides in my book, Skillet Love!


LAST-MINUTE SCALLOPED POTATOES RECIPE:

Makes: 8 servings | Prep: 5 to 10 minutes | Cook: 46 to 51 minutes

1 bag (32 ounces) diced frozen hash brown potatoes
1/2 cup grated Parmesan cheese
3 cloves garlic, minced
Salt and freshly ground black pepper to taste
2 cups heavy cream
1 tablespoon grated Parmesan
1/4 cup shredded Gruyere or sharp white cheddar, for the top, if desired, OR 1/2 cup soft bread crumbs tossed with 1 tablespoon melted butter, for the top

  1. Place a rack in the center of the oven, and preheat the oven to 400 degrees F.

  2. Empty the bag of hash browns into a 12-inch skillet. Stir in the 1/2 cup Parmesan, garlic, salt and pepper to taste, and cream until combined. Cover the skillet with a lid or with foil, and place the skillet in the oven. Bake until the mixture is bubbly, about 45 to 50 minutes. Remove the skillet from the oven.

  3. Turn off the oven and preheat the broiler. Uncover the skillet, and scatter the tablespoon of Parmesan and the Gruyere on top, and place the skillet under the broiler until the cheese melts and turns golden, no more than 1 minute. Remove and serve at once. OR, forgo the cheese, and scatter the buttered bread crumbs on top about 10 minutes before the potatoes are done. Return the skillet to the oven, and bake until golden brown.

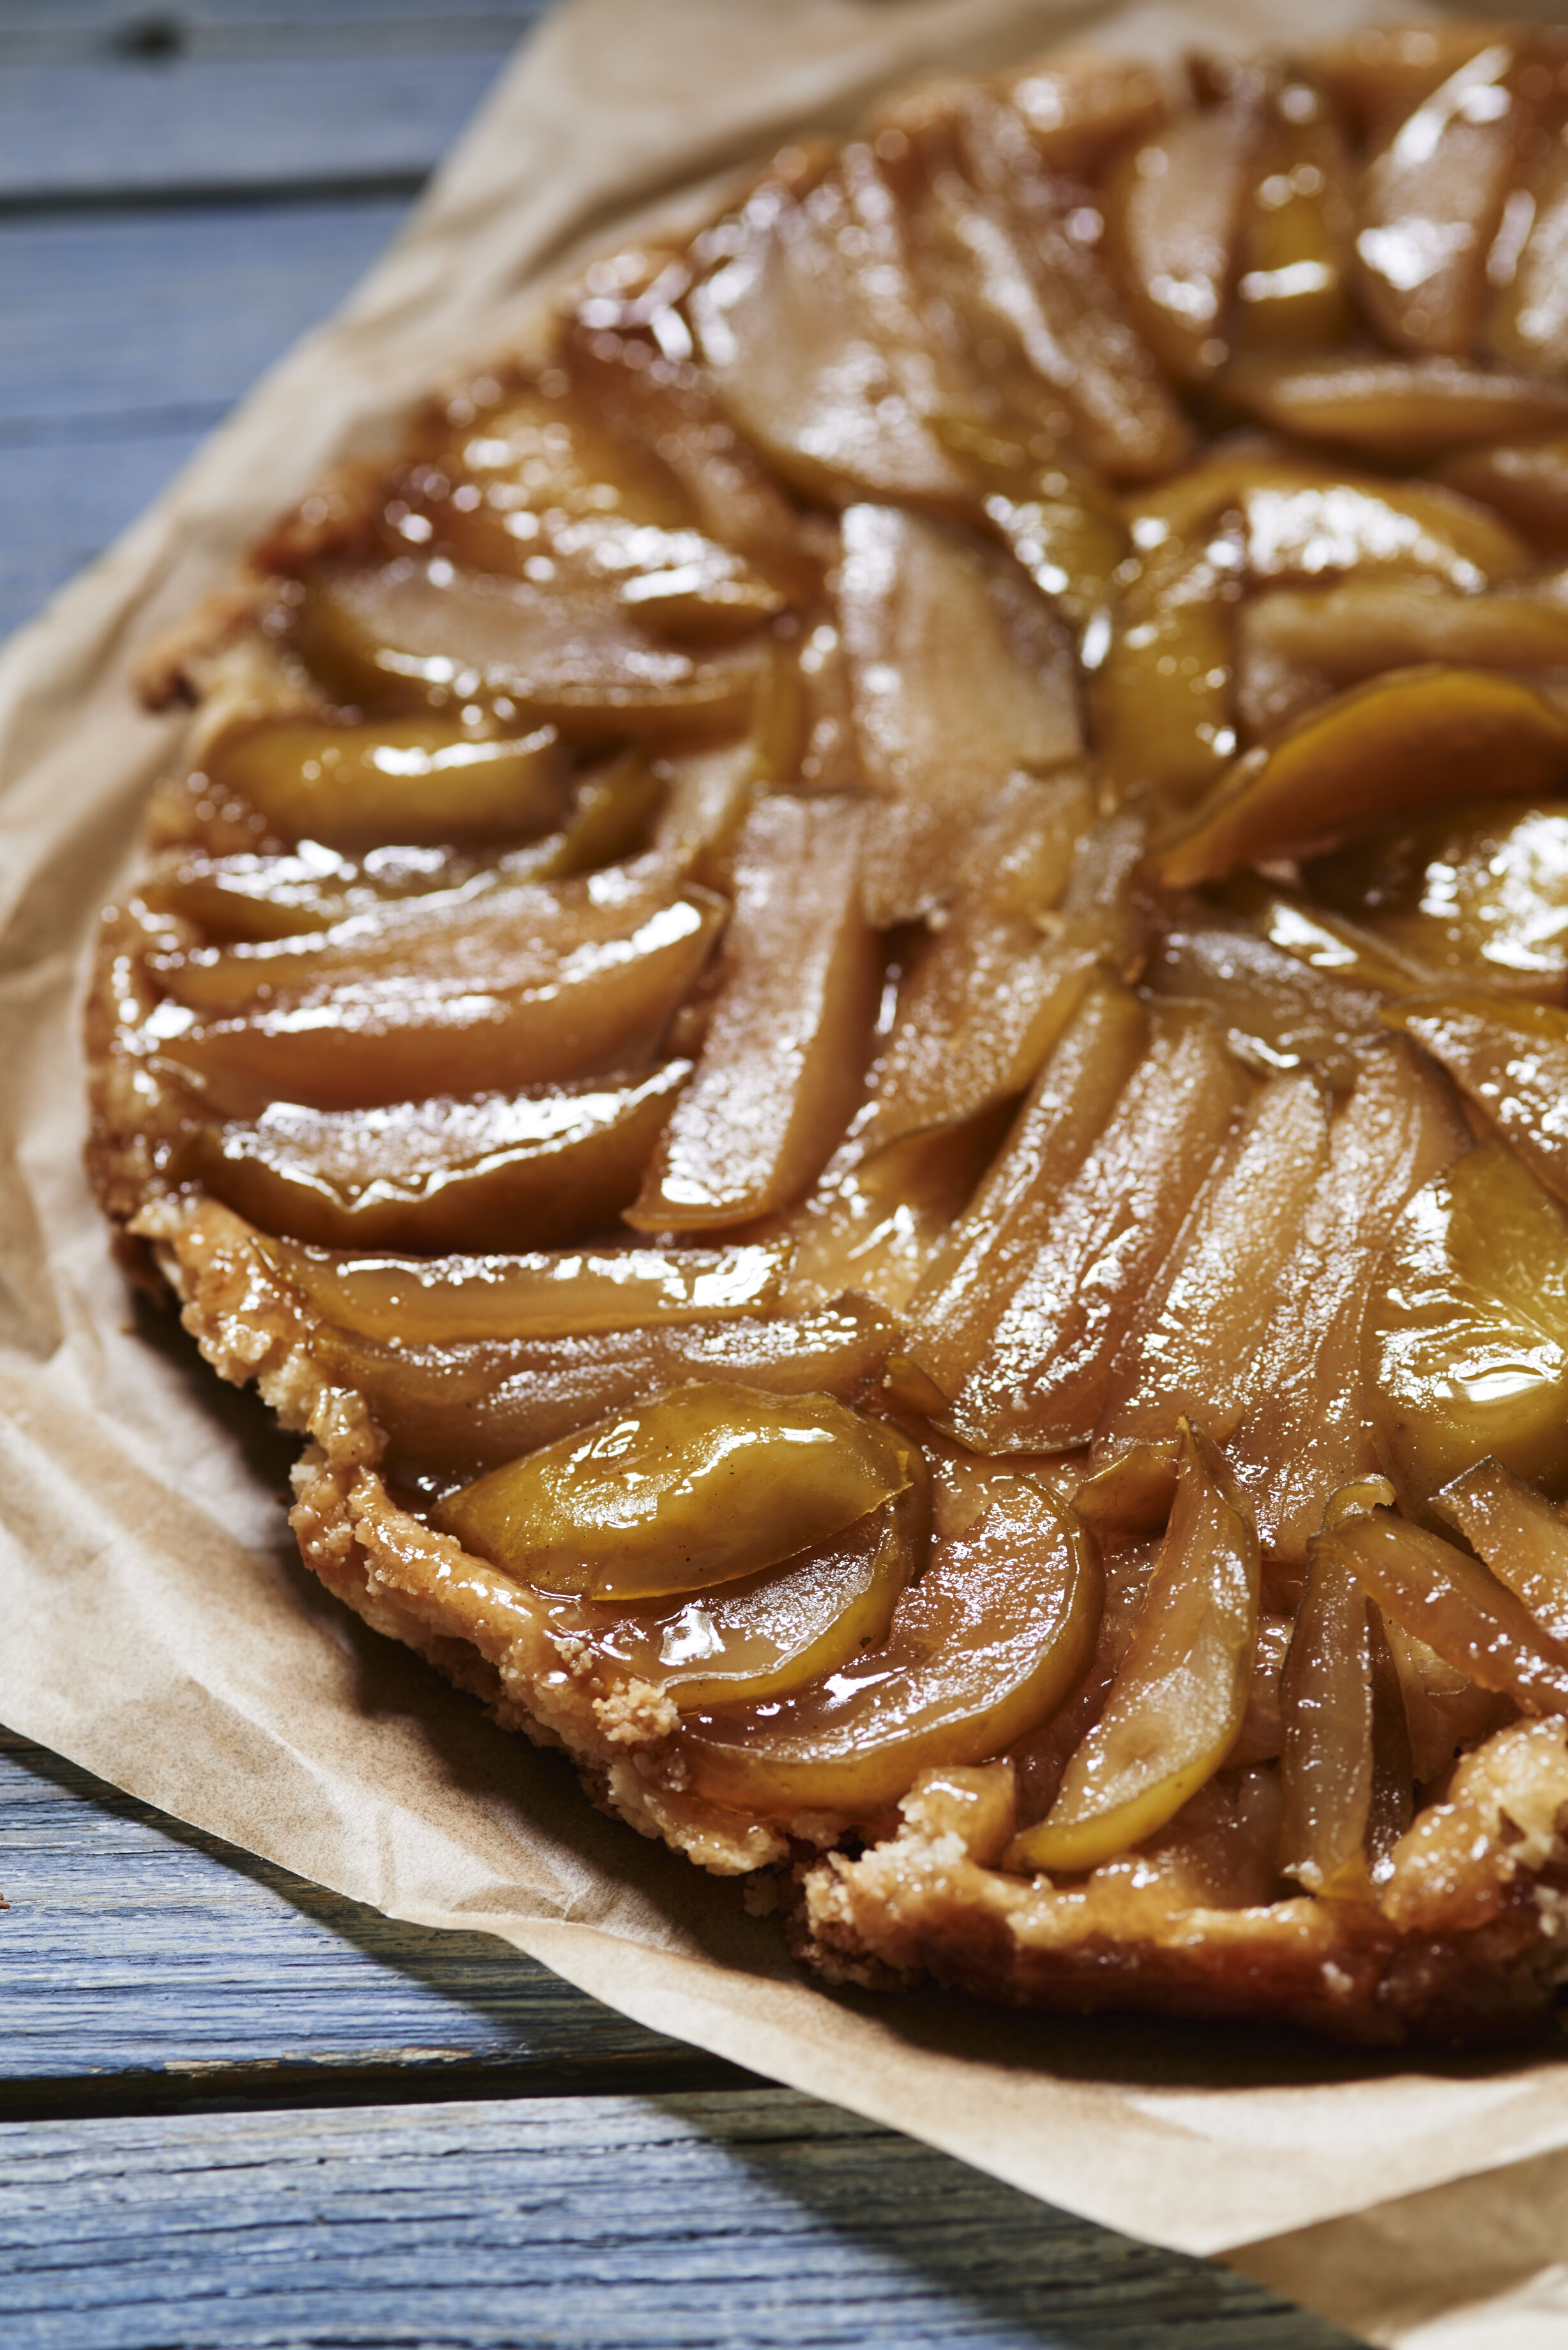
Apple Tarte Tatin

Apple Tarte Tatin

SL_Tarte_Tatin_020.jpg

Tarte Tatin was an upside-down apple pie first baked by two sisters in the Loire Valley region of France. It was just caramelized apples and pastry, but that’s where the secrets lie. The apples need to be tart and local and fresh, the best you can find. Peel them. And the pastry should be homemade, but in a pinch, of course, you can use store-bought. I love baking this pie in the iron skillet because the juices caramelize, which creates flavor! If the apples stick to the skillet when you try to invert this pie, simply scrape them off the skillet and patch them into place. And, make sure you have good vanilla ice cream to serve alongside!


APPLE TARTE TATIN RECIPE:

6 tablespoons unsalted butter
1/4 cup granulated sugar
1/4 cup firmly packed light brown sugar
1/4 teaspoon ground cinnamon, optional
2 pounds tart apples, peeled, cored, quartered, and each quarter cut into 3 slices
2 rounds pie pastry or one recipe Homemade Pie crust
Vanilla ice cream

  1. Preheat the oven to 400 degrees F.

  2. Melt the butter in a 12-inch skillet over medium-low heat. Add both the sugars and cinnamon, if using, and stir to combine. Spread out the sugar mixture, and arrange the apple sices in concentric circles in the bottom of the pan. Cook, undisturbed, so the apples develop a golden brown color underneath but do not stick, 20 to 25 minutes.

  3. Roll out the pie pastry to make one 12-inch circle that is 1/3-inch thick. Place the circle of dough on top of the apples, tucking the edges under so the pastry fits in the skillet.

  4. Place the skillet in the oven and bake until the pastry is lightly browned, 30 to 35 minutes. Remove the skillet from the oven. Place a large, flat platter on top of the skillet. Invert the hot skillet onto the platter and carefully hit the skillet with your hand (in an oven mitt!) to release any apples that might stick. Let tart fall onto a platter and replace any stuck apples. Serve warm with ice cream.

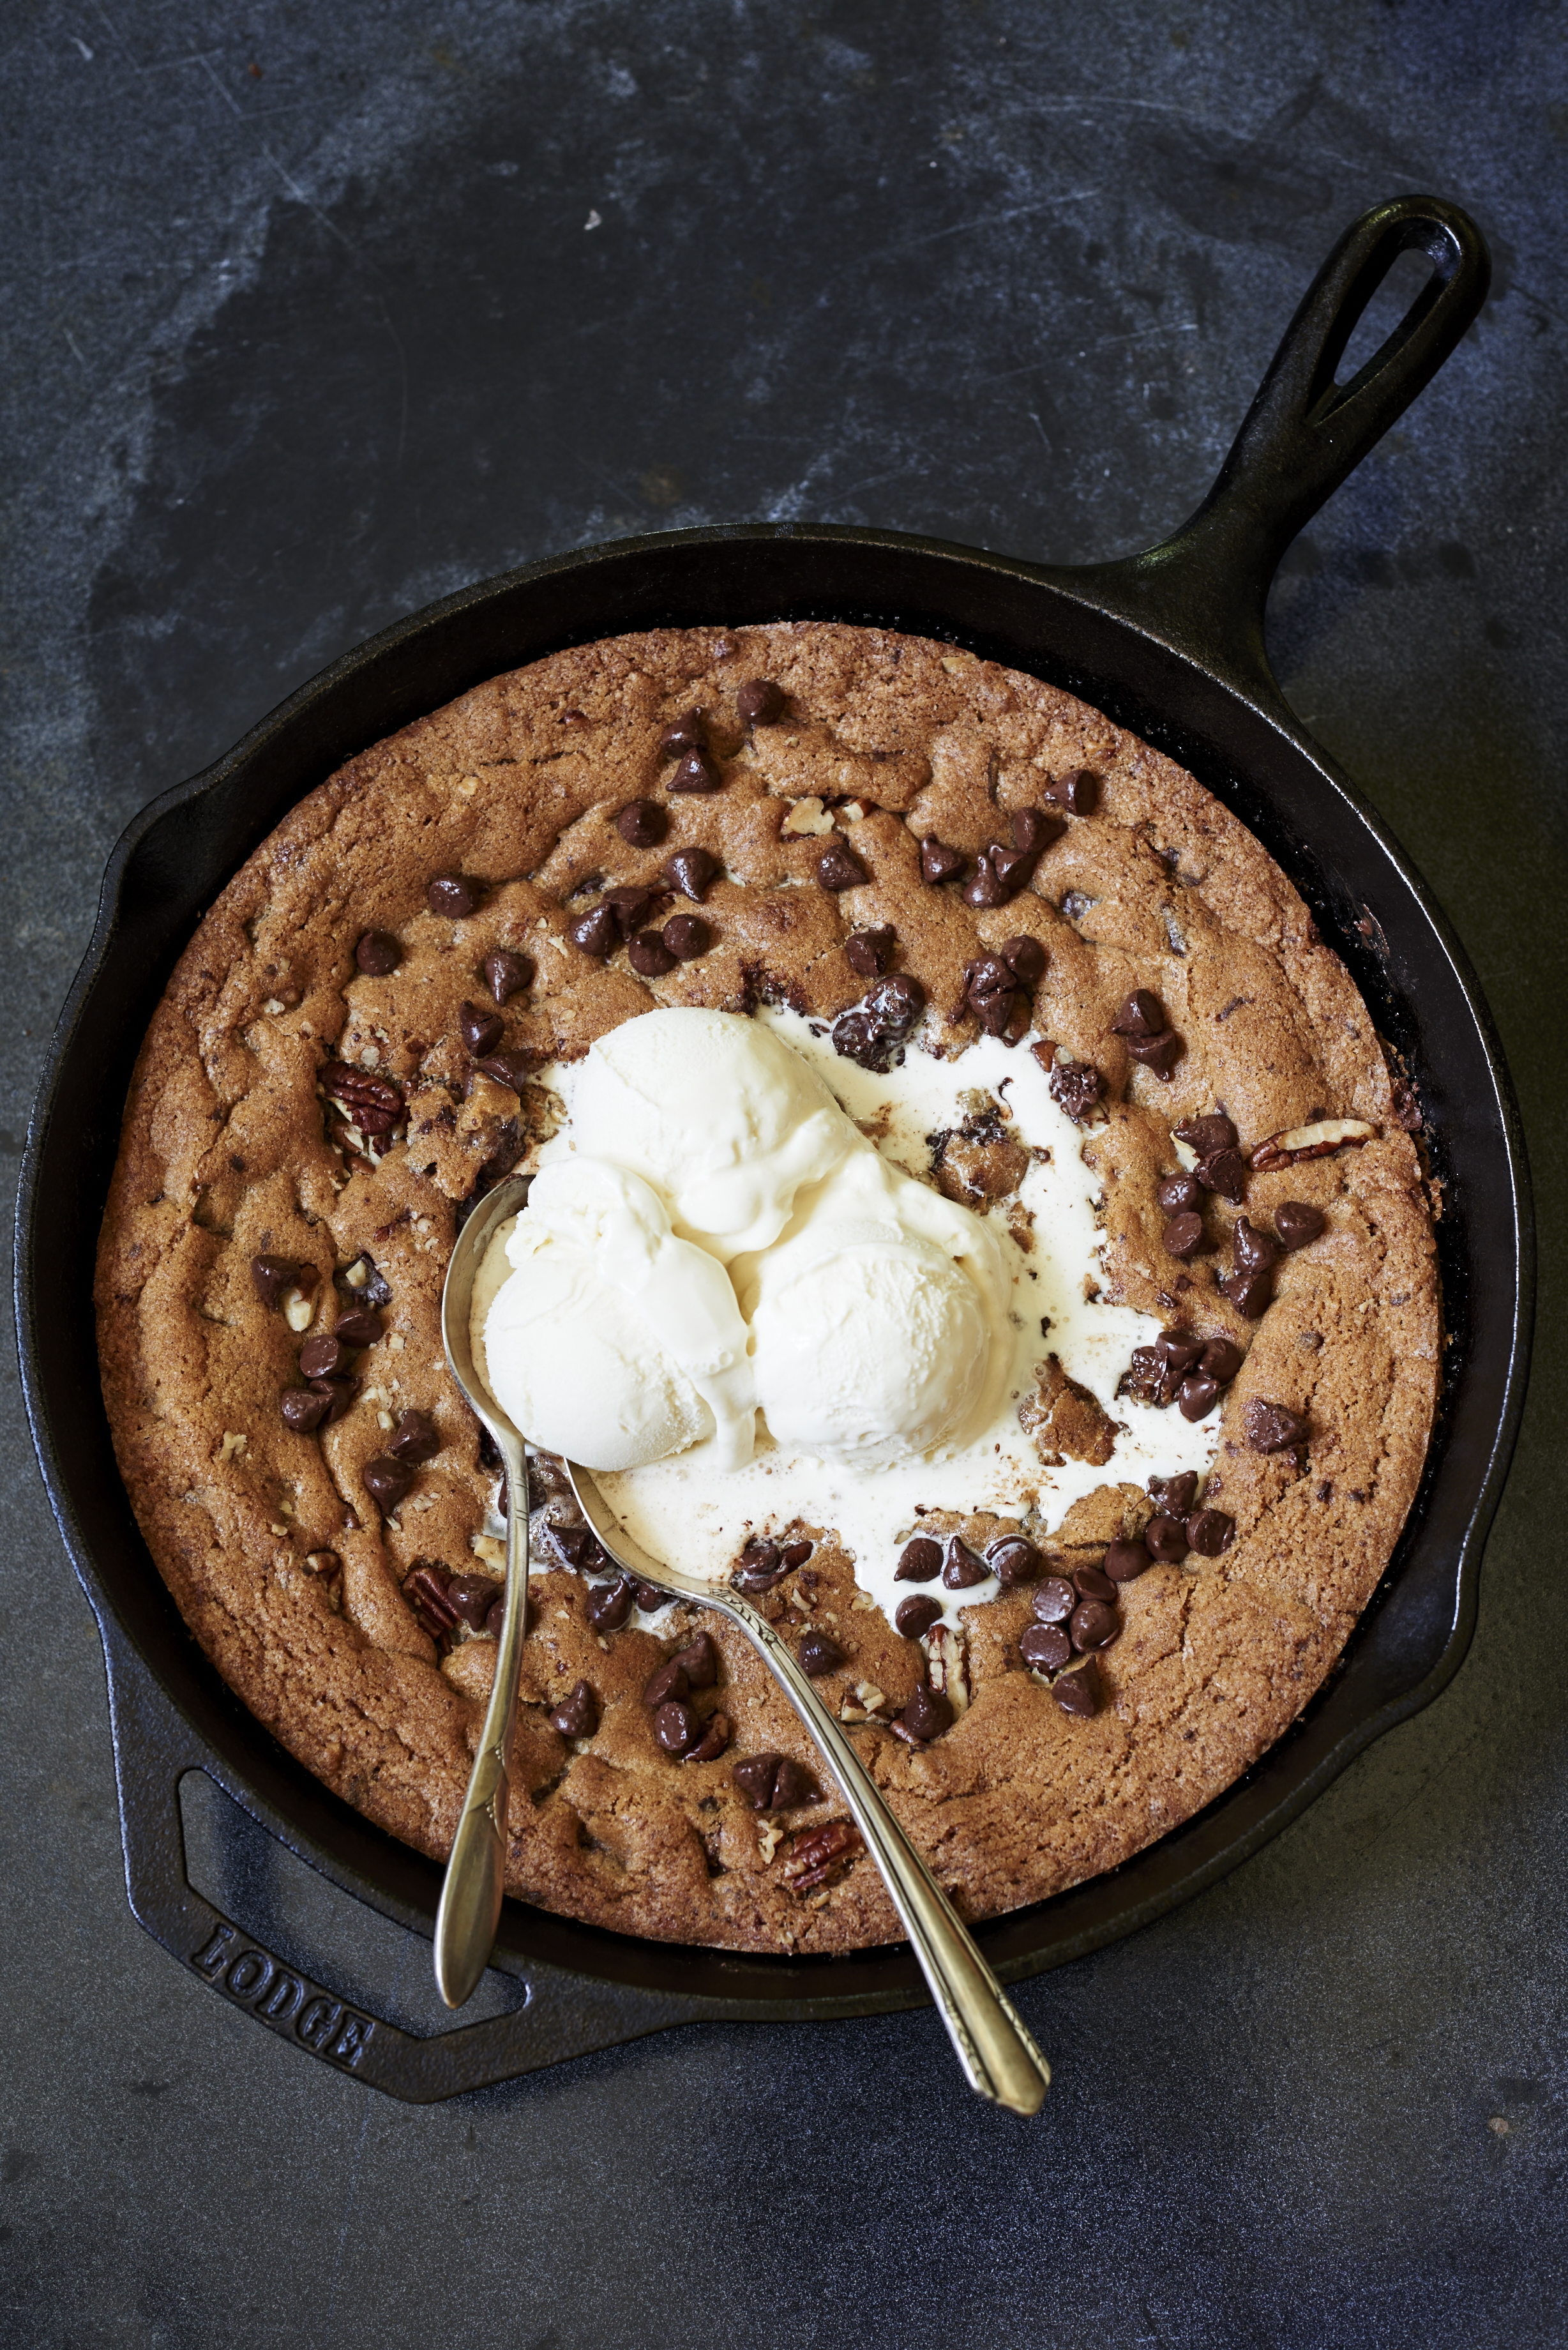
Warm Chocolate Chunk Cookie to Share

sl_chocolate_chunk_014 (1).JPG

Warm Chocolate Chunk Cookie to Share


Recipe from my new book, Skillet Love, available October 29, 2019!

This warm skillet dessert brings everyone to the table. Even if they don’t love dessert, they will want a spoonful of this big, ooey-gooey cookie. Make sure not to over-cook. The edges should be crispy but the center still soft and spoonable.

I like to use a mixture of chocolate in this recipe - semisweet chocolate chips as well as chopped bittersweet chocolate. It is that nice mixture of sweet and not-so-sweet that keeps this dessert interesting. And toss on chopped walnuts or pecans before baking - whatever you’ve got. The ice cream? Vanilla, buttermilk, or even caramel. You can’t go wrong!


WARM CHOCOLATE CHUNK COOKIE TO SHARE:

1 cup (2 sticks) unsalted butter
3/4 cup firmly packed dark brown sugar
3/4 cup granulated sugar
2 large eggs, lightly beaten
1 teaspoon vanilla extract
2 cups all-purpose flour
1 teaspoon baking soda
1 teaspoon salt
1 cup (6 ounces) semisweet chocolate chips
10 ounces bittersweet chocolate chunks
1/2 cup coarsely chopped walnuts or pecans
Vanilla ice cream, for serving

  1. Preheat the oven to 375 degrees F.

  2. Melt the butter in a 12-inch cast-iron skillet over low heat. Turn off the heat. Stir both sugars into the melted butter. Fold in the eggs and vanilla.

  3. In a small bowl, whisk together the flour, baking soda, and salt. Add the flour mixture to the butter-sugar mixture and stir until smooth. Fold in the chocolate chips and chocolate chunks. Run a wet paper towel around the edges of the pan to clean them up. Scatter the nuts over the top of the batter.

  4. Place the skillet in the oven and bake until the edges are lightly browned and the center is still a little soft to the touch, 25 to 30 minutes. Remove the pan from the oven. Serve warm with vanilla ice cream.

Zucchini Cake with Brown Sugar Frosting

IMG_1384 (1).JPG

Zucchini Cake with Brown Sugar Frosting

With an August birthday and a garden that cranks out zucchini in the summer heat, this has become my favorite birthday cake.

And it was never planned! I had a favorite zucchini bread recipes and wondered how that bread would taste baked in a cake pan. Plus, a reader passed along a wonderful brown sugar cream cheese frosting recipe with a deep, rich flavor, and I knew that frosting was destined for the zucchini bread/cake crossover.

It’s a little like the magic created by a carrot cake, only better. Now, I just need to find someone each August to bake me this cake. And if that’s not possible, then I just bake it myself!


ZUCCHINI CAKE WITH BROWN SUGAR FROSTING RECIPE:

Makes: 12 servings | Prep: 45 to 50 minutes | Bake: 30 to 35 minutes

For the cake:
3 cups all-purpose flour
1 tablespoon cinnamon
1 teaspoon baking soda
3/4 teaspoon salt
1/2 teaspoon baking powder
2 large eggs
2 cups granulated sugar
1 cup vegetable oil
1 teaspoon vanilla
1/2 cup finely chopped walnuts or pecans (see Note)
2 packed cups grated zucchini (about 1 pound)

Brown Sugar Frosting:
8 ounces cream cheese, at room temperature
8 tablespoons (1 stick) lightly salted butter, at room temperature
1 firmly packed cup light brown sugar
1 teaspoon vanilla extract

  1. Place a rack in the center of the oven, and heat the oven to 350 degrees F. Mist two 9-inch round cake pans with vegetable oil spray and dust with flour. Shake out the excess flour and set the pans aside.

  2. Place the flour, cinnamon, soda, salt, and baking powder in a medium bowl and stir to combine well. Set aside.

  3. Place the eggs and sugar in a large mixing bowl, and blend with an electric mixer on low speed until they are combined. Increase the mixer to medium and blend until lemon colored, 2 minutes. Add the oil and vanilla and blend 1 minute, until combined. Fold in the dry ingredients and walnuts, if desired. Fold in the zucchini. Stir with a wooden spoon until the ingredients are well combined. Divide the batter between the two prepared pans, and place the pans in the oven.

  4. Bake until the cake layers test done by pressing the top lightly with your fingers so they spring back, 30 to 35 minutes. Remove the layers from the oven, and let them cool in the pan for 15 minutes. Run a knife around the edges and shake the pans gently to loosen the cakes. Invert the cakes onto racks to cool right-side up. Let cool 30 minutes before frosting.

  5. For the frosting, with an electric mixer, blend the cream cheese and butter together until fluffy. Add the brown sugar and vanilla and beat until well combined, 2 to 3 minutes.

  6. To assemble the cake, place one cake layer on a plate, and cover with about 1/3 cup frosting, spreading to the edges. Place the second layer on top. Place about 1 cup frosting on top of the cake, and spread decoratively. Use the rest of the frosting to thinly frost the sides of the cake in smooth strokes. If desired, press toasted walnuts or pecans around the sides or on top of the cake. Slice and serve.


Note: Instead of folding chopped walnuts or pecans into the cake batter, you can lightly toast them at 350 degrees F for 3 to 4 minutes, then press them onto the top or sides of the cake as garnish.

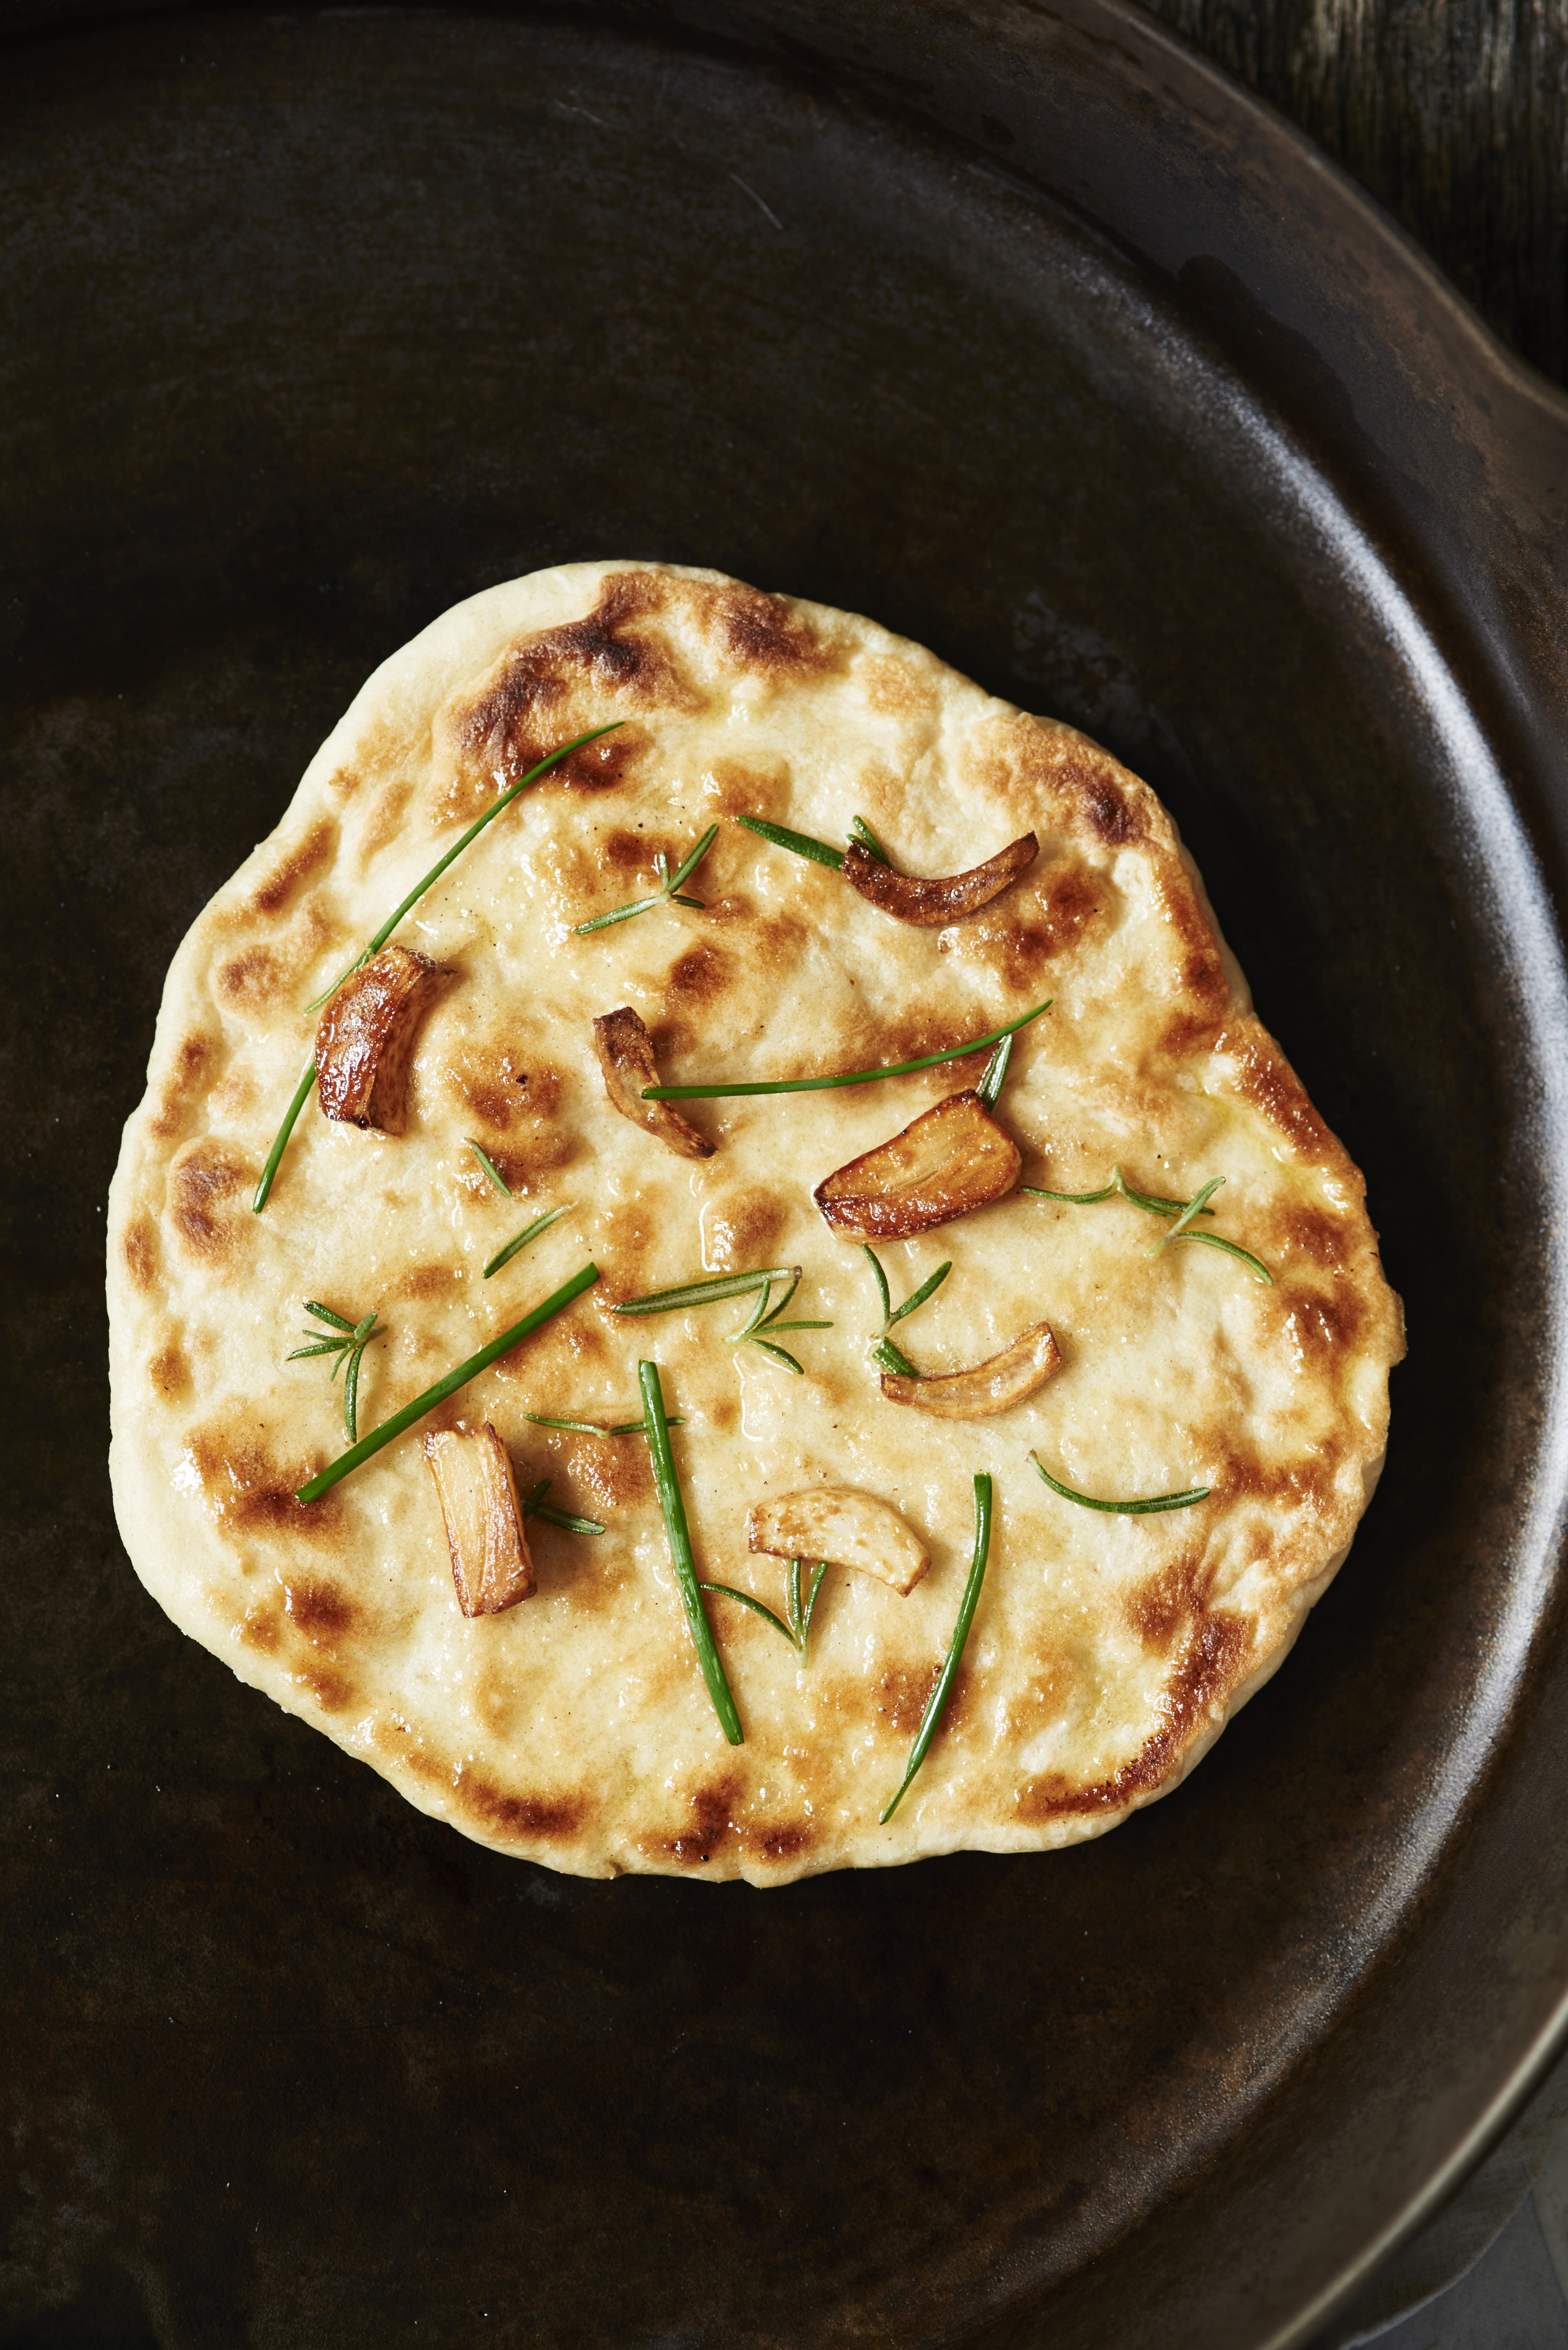
Stovetop Naan with Fresh Herbs and Garlic

SL_Stovetop_Naan_007.jpg

Stovetop Naan with Fresh Herbs and Garlic

Living a year in England gave me a love of Indian food that would last all my life. But I never thought I could create my own naan, the yeast-risen flatbread essential to Indian cuisine... until I pulled out the iron skillet .

Naan dough is only a simple flour mixture moistened by yogurt that needs a really hot surface to cook. It seemed natural to let the skillet mimic the floor of the tandoori oven. And so, I set to work.

Naan is an old Indian bread, and some people believe it originally came from Persia (Iran). Because it contained yeast and a good bit of technique to pull off, it was considered a bread of the wealthy and royal households. Thus you see all the elaborate naan fillings on the menu at Indian restaurants. Fruits, coconut, meat, anything can be added to naan when your budget allows it. Today, we can make a much simpler version in our own kitchens.

This recipe makes about a dozen, so save this for parties where Indian or grilled foods with nice sauces are served. Flatbreads like naan seem to capture and soak up all the delicious flavors on the plate. Or, they can be served as a snack or appetizer with hummus. Yum!


STOVETOP NAAN WITH FRESH HERBS AND GARLIC RECIPE:

Makes: 12 to 15 naan | Prep: 20 to 25 minutes | Rise: 1 1/2 hours | Cook: 2 to 3 minutes, per batch

1/4 cup warm water
1 package (.25 ounces; 2 1/4 teaspoons) active dry yeast
1 tablespoon sugar
4 cups unbleached all-purpose flour
1 teaspoon baking powder
1 teaspoon baking soda
3/4 cup (6 ounces) whole milk, at room temperature
1/2 cup (4 ounces) plain full-fat yogurt
Vegetable oil for oiling your hands and bowl
Flour for dusting the work surface
4 tablespoons melted butter or olive oil
4 cloves garlic, peeled and sliced
2 tablespoons roughly chopped fresh herbs (rosemary, thyme, oregano)
Kosher salt, for sprinkling

  1. Measure the water into a 1-cup glass measure. Stir in the yeast and sugar until dissolved. Set the yeast mixture aside to bubble up, about 6 to 8 minutes.

  2. Place the flour, baking powder, and soda in a large bowl, and whisk to combine. Make a well in the center of the flour mixture, and add the yeast mixture, milk, and yogurt. Stir with a wooden spoon until the mixture comes together. With oiled hands, knead the dough until it becomes a smooth ball, about 3 to 4 minutes. Brush vegetable oil in a large bowl, and turn the dough into it. Cover with plastic wrap, and place the bowl in a warm place until the dough has doubled in size, about 1 1/2 hours.

  3. Punch down the dough with your fist, and turn the dough out onto a lightly floured work surface. Knead it lightly and divide into 12 to 15 equal pieces. Roll each piece with a small rolling pin, dusted with flour, until it is about 1/4-inch thick and about 6 to 7 inches across.

  4. Place a 12-inch skillet over medium-high heat until it begins to smoke.

  5. Brush each naan with melted butter or olive oil. Press the garlic slices into the dough. Place two or three naan at a time into the skillet. Cook over medium heat until the dough puffs up on top and is lightly browned on the side next to the pan, about 1 minute. Turn the naan. Sprinkle with a few fresh herbs. Cover the skillet, and cook about 1 to 2 minutes more. Remove the naan to a platter and drizzle with more melted butter or olive oil, if desired. Sprinkle with kosher salt. Repeat with the remaining naan.

Morning Glory Muffins

IMG_7094.jpg

Morning Glory Muffins

One of my favorite muffin recipes is also one of the healthiest.

Oh, don’t get me wrong, I love a great blueberry muffin. And I adore chocolate muffins with dried cherries and chocolate chips. But I just might choose Morning Glory over those two because it is packed with all kinds of great ingredients - carrots, coconut, nuts, cinnamon - and is fun to experiment with if you don’t have those ingredients!

This muffin meets carrot cake has the cinnamon spice and richness we love in carrot cake, but without the heavy cream cheese frosting. It’s a breakfast muffin, something you don’t feel guilty about feeding to children or to yourself on weekday mornings.

I make a bunch of these and freeze them, which allows me to grab and go. With a cup of my home-brewed tea, I’ve got a cheap, healthy, and glorious way to start the day!


MORNING GLORY MUFFIN RECIPE:

Makes: 12 to 14 muffins | Prep: 10 to 15 minutes | Bake: 18 to 23 minutes

1/2 cup raisins, softened in hot water
2 cups whole wheat flour
1 cup light brown sugar
2 teaspoons baking soda
2 teaspoons cinnamon
1/2 teaspoon salt
2 cups grated peeled carrots
1 apple, peeled and grated
1/2 cup unsweetened shredded coconut
1/2 cup finely chopped pecans
3 large eggs
2/3 cup vegetable oil
1/4 cup orange juice
1 teaspoon vanilla

  1. Place a rack in the center of the oven, and preheat the oven to 375 degrees. Set aside a muffin pan with 12 wells. Soak the raisins in hot water to cover and set aside.

  2. Place the flour, brown sugar, soda, cinnamon, and salt in a large bowl and stir to combine. Add the carrots, apple, coconut, and pecans. Make a well in the center and add the eggs, oil, orange juice, and vanilla. Drain and fold in the raisins. Stir the ingredients together until just mixed.

  3. Spray the muffin pan with vegetable oil spray or line with paper liners. Scoop batter into the pan, filling each well nearly to the top. The batter will fill 12 to 14 wells. Place the pan in the oven, and bake until the muffins brown and are just firm on top, 18 to 23 minutes. Run a knife around the edges and transfer to a rack to cool completely.


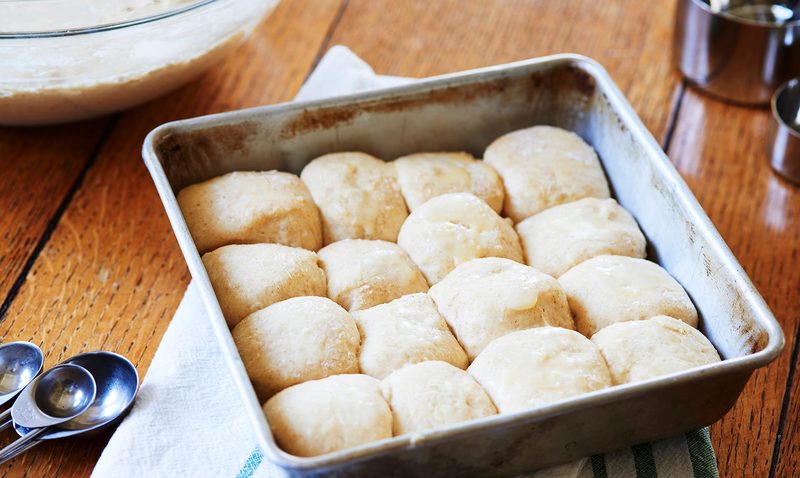
Overnight Refrigerator Rolls

IMG_0749 (1).JPG

Overnight Refrigerator Rolls

As much as I love crusty bread baked in a wood-fired oven, one of my favorite breads insn’t crusty at all. It’s those soft and Southern yeast rolls, which are as much a part of my food story as cornbread or biscuits.

My mother made yeast rolls each and every time company came to visit. And when she was in a hurry, she made overnight rolls.

Overnight rolls, refrigerator rolls, icebox rolls, sometimes called “Frigidaire” rolls, this do-ahead bread dough goes by myriad names. It’s an age-old concept, perfected in the 1930s when women were busy in the workforce, so meals were planned ahead. And with a little forethought, and a refrigrator, bread was freshly baked and served warm at each meal.

The concept of setting dough aside for a longer, slower rise has been around for generations, or at least, until refrigeration came on the scene. You see, cooler temps slow down the growth of yeast, which means the rising dough stands still in the fridge until pulled out and placed in a warm spot to begin rising again.

And the added bonus is that while the dough seems slow to rise, it is developing flavor and its texture is improving. Dough left to rest in cold temperatures overnight will be easier to work with the next day. It will be less sticky and require less flour for rolling out, and thus, the bread doesn’t dry out from too much flour.

Overnight rolls just taste better, too. And whatever you like to call them, these rolls are a nice addition to your baking repertoire. They freeze well, too, if there are any left!


OVERNIGHT REFRIGERATOR ROLLS RECIPE:

Makes about 4 dozen | Prep: 20 minutes | Rise: 1 hour, plus 30 minutes at room temperature, plus overnight in refrigerator | Bake: 15 to 18 minutes

1 1/2 cups cubed, peeled potatoes (from 1 medium russet potato)
1/2 cup (1 stick) unsalted butter, plus more, melted for brushing and greasing
1 package (2 1/4 teaspoons) active dry yeast
1/2 cup sugar
2 large eggs
1 1/2 teaspoons salt
4 cups all-purpose flour, plus more for rolling
1 cup whole-wheat flour

  1. In a small saucepan, cover the potatoes with water. Bring to a boil over medium-high heat, then reduce the heat to low, cover, and simmer until the potatoes are tender, about 15 minutes. Drain, reserving 3/4 cup of the cooking water.

  2. Place the reserved cooking water and the butter back into the small saucepan and heat to 110 degrees over low heat. Remove from the heat and stir in the yeast to dissolve.

  3. Transfer the cooked potatoes to a large bowl and mash. Stir in the sugar, eggs and salt. Stir in the yeast mixture, followed by the flours. Continue to mix with a wooden spoon or electric mixer until smooth. Cover the bowl with a kitchen towel, and let it rise in a warm place until doubled in size, about 1 hour. Punch down the dough, cover the bowl with plastic wrap, place in the fridge at least overnight, and for up to three days.

  4. When ready to bake, heat the oven to 375 degrees F. Butter a shallow baking pan or two, depending on the number of rolls you are baking.

  5. Remove as much dough as you like from the bowl, and, on a lightly-floured surface, press into a round about 1/2 inch thick. Using a 2-inch biscuit cutter, cut into rounds.

  6. For round rolls, place the cut rounds side-by-side in the prepared pan and brush the tops with melted butter. For Parker House rolls, dip the rounds in melted butter and fold the dough over as if you are closing a book. Place side-by-side in the pan, and brush the tops with additional butter. Either way, place in a warm place in the kitchen to rise for about 30 minutes.

  7. Bake until the rolls are golden brown, 15 to 18 minutes. Serve warm.


Iron Skillet Cornbread

IMG_2390 (1).JPG

Iron Skillet Cornbread

The best cornbread is crusty on the outside and creamy inside. It’s all about the crust.

And to achieve this perfect cornbread, you need the right ingredients, like a seasoned cast-iron skillet, and some know-how. First up - make a creamy and pourable batter. It should be more like pancake batter than cake batter, able to slide out of the mixing bowl and into the hot skillet.

You also need the right cornmeal, which is preferably white and finely ground. The easiest route is to use self-rising cornmeal, which has the leavening in it. Add to that full-fat buttermilk and lots of it. You want the acidic twang of buttermilk and can even use full-fat plain yogurt stirred into whole milk in a pinch.

Whether to add eggs or skip the eggs is up to you. But I will add that purists down South prefer egg-less cornbread because it’s creamier in texture and not cakey.

Heat about 2 tablespoons vegetable oil in a 12-inch cast-iron skillet either on top of the stove or in the preheating oven. Always pour batter into a hot pan for the absolute crispiest crust. And once the cornbread is baked to golden brown perfection, turn it out onto a board or rack - don’t let it sit in the pan!

You want to slice that cornbread into crisp wedges and eat them hot with plenty of butter.


IRON SKILLET CORNBREAD RECIPE:

Makes: 8 to 10 servings | Prep: 10 minutes | Cook: 12 to 15 minutes

2 tablespoons vegetable oil or bacon grease
1 3/4 cups self-rising white cornmeal
1/4 cup all-purpose flour
1 1/2 cups full-fat buttermilk
1/4 cup vegetable oil
Butter and honey for serving

  1. Place a rack in the center of the oven, and heat the oven to 450 degrees F. Place the oil or bacon grease in a 12-inch cast-iron skillet and place the skillet in the oven while it heats.

  2. In a large bowl, whisk together the cornmeal and flour. Stir in the buttermilk and oil until smooth. The mixture should be creamy and pourable.

  3. Once the skillet is quite hot, carefully remove it from the oven, and pour in the batter. It should sizzle. Place the skillet in the oven, and let the cornbread bake until deeply browned on top and around the edges. The center should spring back when touched lightly with your finger, from 12 to 15 minutes.

  4. Remove the pan from the oven, run a knife around the edges, and turn the cornbread out onto a board to slice and serve.

My Grandmother's Spoonbread

IMG_0748 (1).JPG

My Grandmother’s Spoonbread

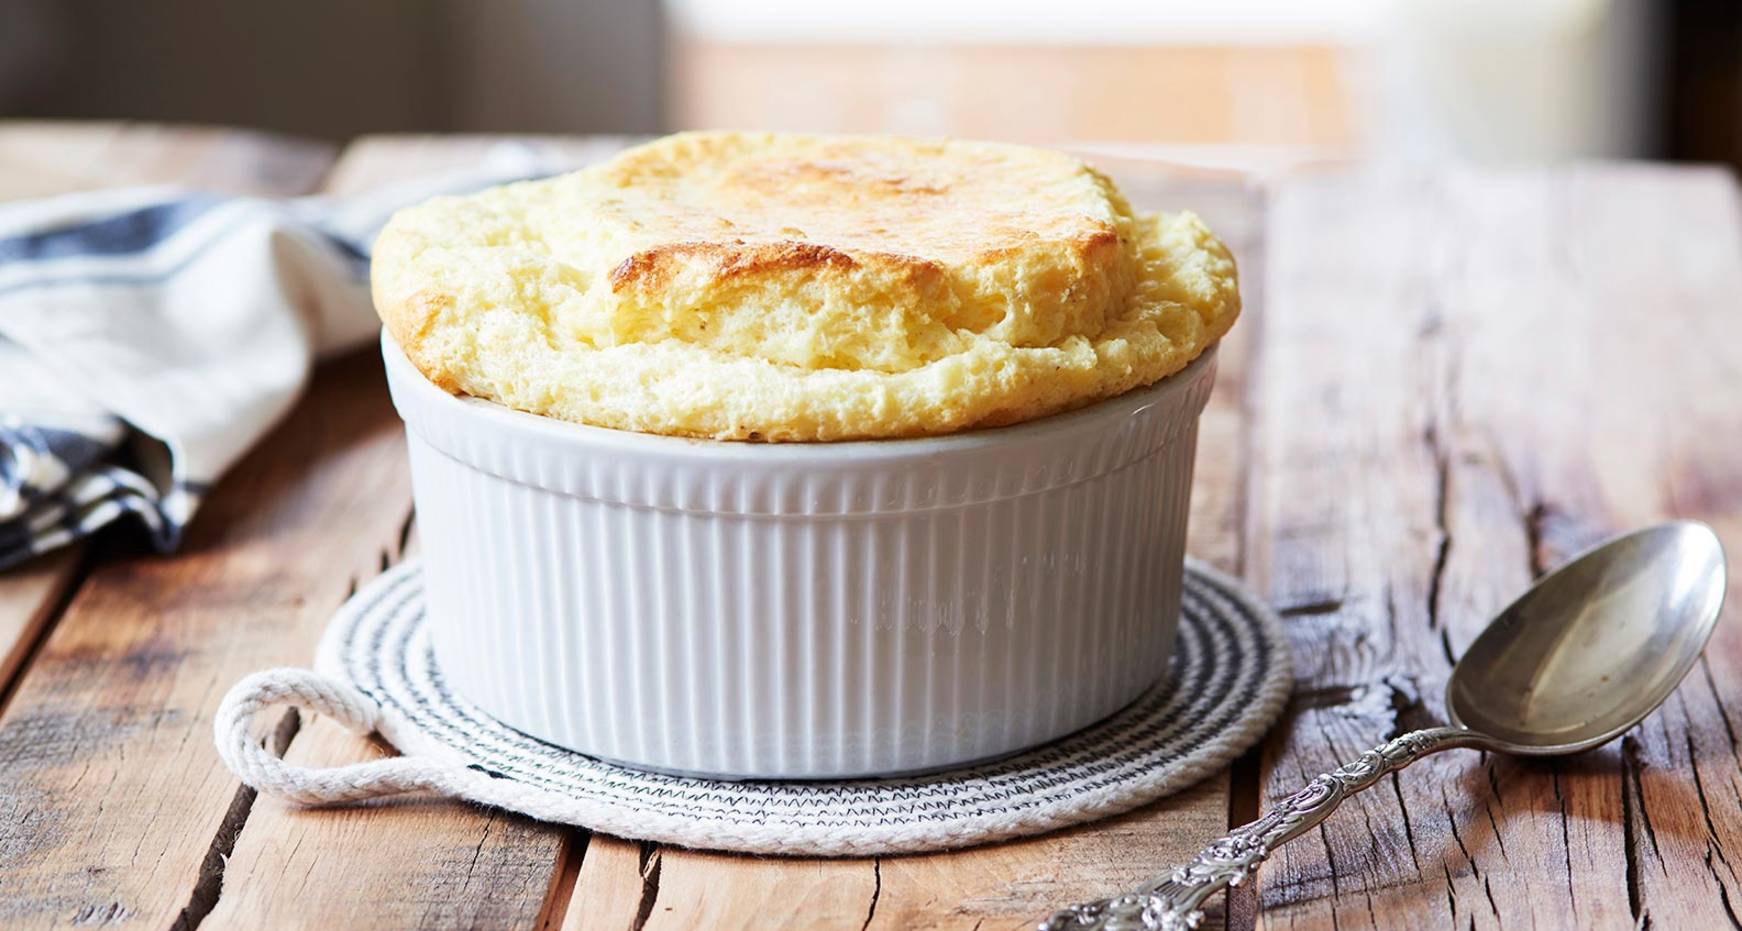
The soft, ethereal cornbread known as “spoonbread,” used to be the souffle of the South. It was the most divine use of cornmeal, and no truly Southern cookbook was without a recipe for this bread to be served with a spoon. It was and still is the best example of how European culinary techniques married with native ingredients of the new world.

Although historians say the name has only been used to describe this bread since the end of the 19th Century, it is older and went by other names like “batter bread.” The Low Country, thanks to Sarah Rutledge in her 1847 The Carolina Housewife, has an “Owendaw” version, in which the cornmeal, butter, egg and milk batter is placed in a big pan with room to rise. She writes that it has the “delicacy of a baked custard.”

But of all the Southern states claiming to be spoonbread’s birthplace, Virginia is the most likely. Baked ham and spoonbread are woven in time, and in Virginia, spoonbread recipes took a decidedly French turn when the method of beating egg whites, and folding them into the cornmeal batter in a souffle-like method, created the high, puffy spoonbread we have grown to love.

Years ago, I studied spoonbread in great detail for Cook’s Illustrated magazine. I perfected a basic recipe, and then I went off in different directions to see if the recipe would allow cheese, shaved corn, shredded zucchini, and chopped ham to be incorporated. (The answer is yes.)

In my favorite spoonbread, white cornmeal is cooked with milk until very thick. I use no flour. Egg yolks are added for richness, and then egg whites are beaten into nearly stiff peaks and folded in carefully. No other leavening is needed.

It’s my grandmother’s recipe, and one that rested in her recipe box and now my recipe box and perhaps yours as I share it with you now.


MY GRANDMOTHER’S SPOONBREAD RECIPE:

Makes: 6 servings | Prep: 25 minutes | Cook: 40 to 45 minutes

Soft butter for greasing the pan
3 cups whole milk
2 teaspoons salt
1 cup white cornmeal
6 tablespoons unsalted butter
1 tablespoon sugar
1/4 teaspoon ground nutmeg
1/4 teaspoon cayenne pepper
3 large eggs

  1. Place a rack in the center of the oven, and heat the oven to 350 degrees F. Grease a 2-quart casserole or 8-cup souffle dish with the soft butter. Set aside.

  2. In a large heavy saucepan, combine the milk and salt. Bring to a boil over medium-high heat, and once boiling, slowly whisk in the cornmeal. Reduce the heat to low, and simmer, whisking, until the mixture is very thick, about 5 minutes. Remove from the heat, and whisk in the butter, sugar, nutmeg, and cayenne. Continue to whisk until the butter melts.

  3. Separate the eggs, placing the yolks in a small bowl and the whites in a large stainless steel or glass bowl with a pinch of salt.

  4. Stir about a tablespoon of the cornmeal mixture into the egg yolks to raise their temperature. Repeat. Add the egg yolk mixture to the remaining cornmeal mixture and stir until smooth.

  5. Using an electric mixer, beat the egg whites on high speed until stiff but not dry, 2 to 3 minutes. Fold the beaten whites into the cornmeal mixture until nearly smooth. Transfer to the prepared casserole and smooth the top.

  6. Bake until the spoonbread is golden brown and puffed, 40 to 45 minutes. Serve immediately.

Pink Grapefruit and Avocado Salad

Pink Grapefruit and Avocado Salad.jpg

Pink Grapefruit and Avocado Salad

My friend Libby Patterson remembers a jar of her mother’s homemade sweet vinaigrette always being in the refrigerator at home in Mobile, Alabama. It was the go-to dressing for all salads, and it was the way her mother transformed avocado, grapefruit and greens into a masterful arrangement of bright flavor and vivid color.

I shared Libby’s recipe in my book, Anne Byrn Saves the Day, and I’m sharing it with you here. It has been my go-to salad at Thanksgiving dinner and anytime where we need a big, bright, fresh salad to go alongside a roasted turkey or other important entree. It goes well with casseroles and freshens up the meal. And that vinaigrette is a good keeper in the fridge for a month, ready when you are!

Makes: 6 to 8 servings | Prep: 30 minutes

Vinaigrette:
1/2 cup plus 2 teaspoons apple cider vinegar
1/2 cup sugar
2 teaspoons salt
1/2 teaspoon freshly ground black pepper
3/4 cup vegetable oil
1 clove garlic, peeled and cut in half

Salad:
1 medium-size head Boston or Bibb lettuce
1 large pink grapefruit
1 large ripe mango
2 ripe medium-size Hass avocados

  1. Make the vinaigrette: Place the vinegar, sugar, salt, and pepper in a mixing bowl and whisk to combine. Add the oil at little at a time, whisking to combine. Add the garlic. Set aside. Discard the garlic before serving.

  2. Make the salad: Rinse the lettuce, dry the leaves, and place them between paper towels in the fridge. Or, use a salad spinner. Chill the lettuce leaves until time to serve.

  3. Peel the grapefruit and separate it into sections. Remove and discard the membranes from the grapefruit sections, using a small paring knife to cut off the membrane. You will have 10 to 12 sections per grapefruit. Set aside.

  4. Peel the mango with the small paring knife. Place the mango on the cutting board and cut off large chunks from the wide, flat pit. Cut each chunk into slices about 1/8-inch thick.

  5. Peel avocados, and cut in half. Remove the pits, and slice into 1/4-inch slices. Set aside.

  6. To assemble the salad, line a platter or plates with lettuce leaves. Arrange avocado slices, then mango, then grapefruit. When ready to serve, discard the garlic, and drizzle 1/4 to 1/3 cup vinaigrette over the fruit and lettuce. Serve remaining dressing to the side, and chill leftovers.


Turn this salad into something even more festive by adding pomegranate seeds to the top.

Arugula Salad with Orange and Sweet Pan Drizzle

sl_arugula_salad_018.JPG

Arugula Salad with Orange and Sweet Pan Drizzle

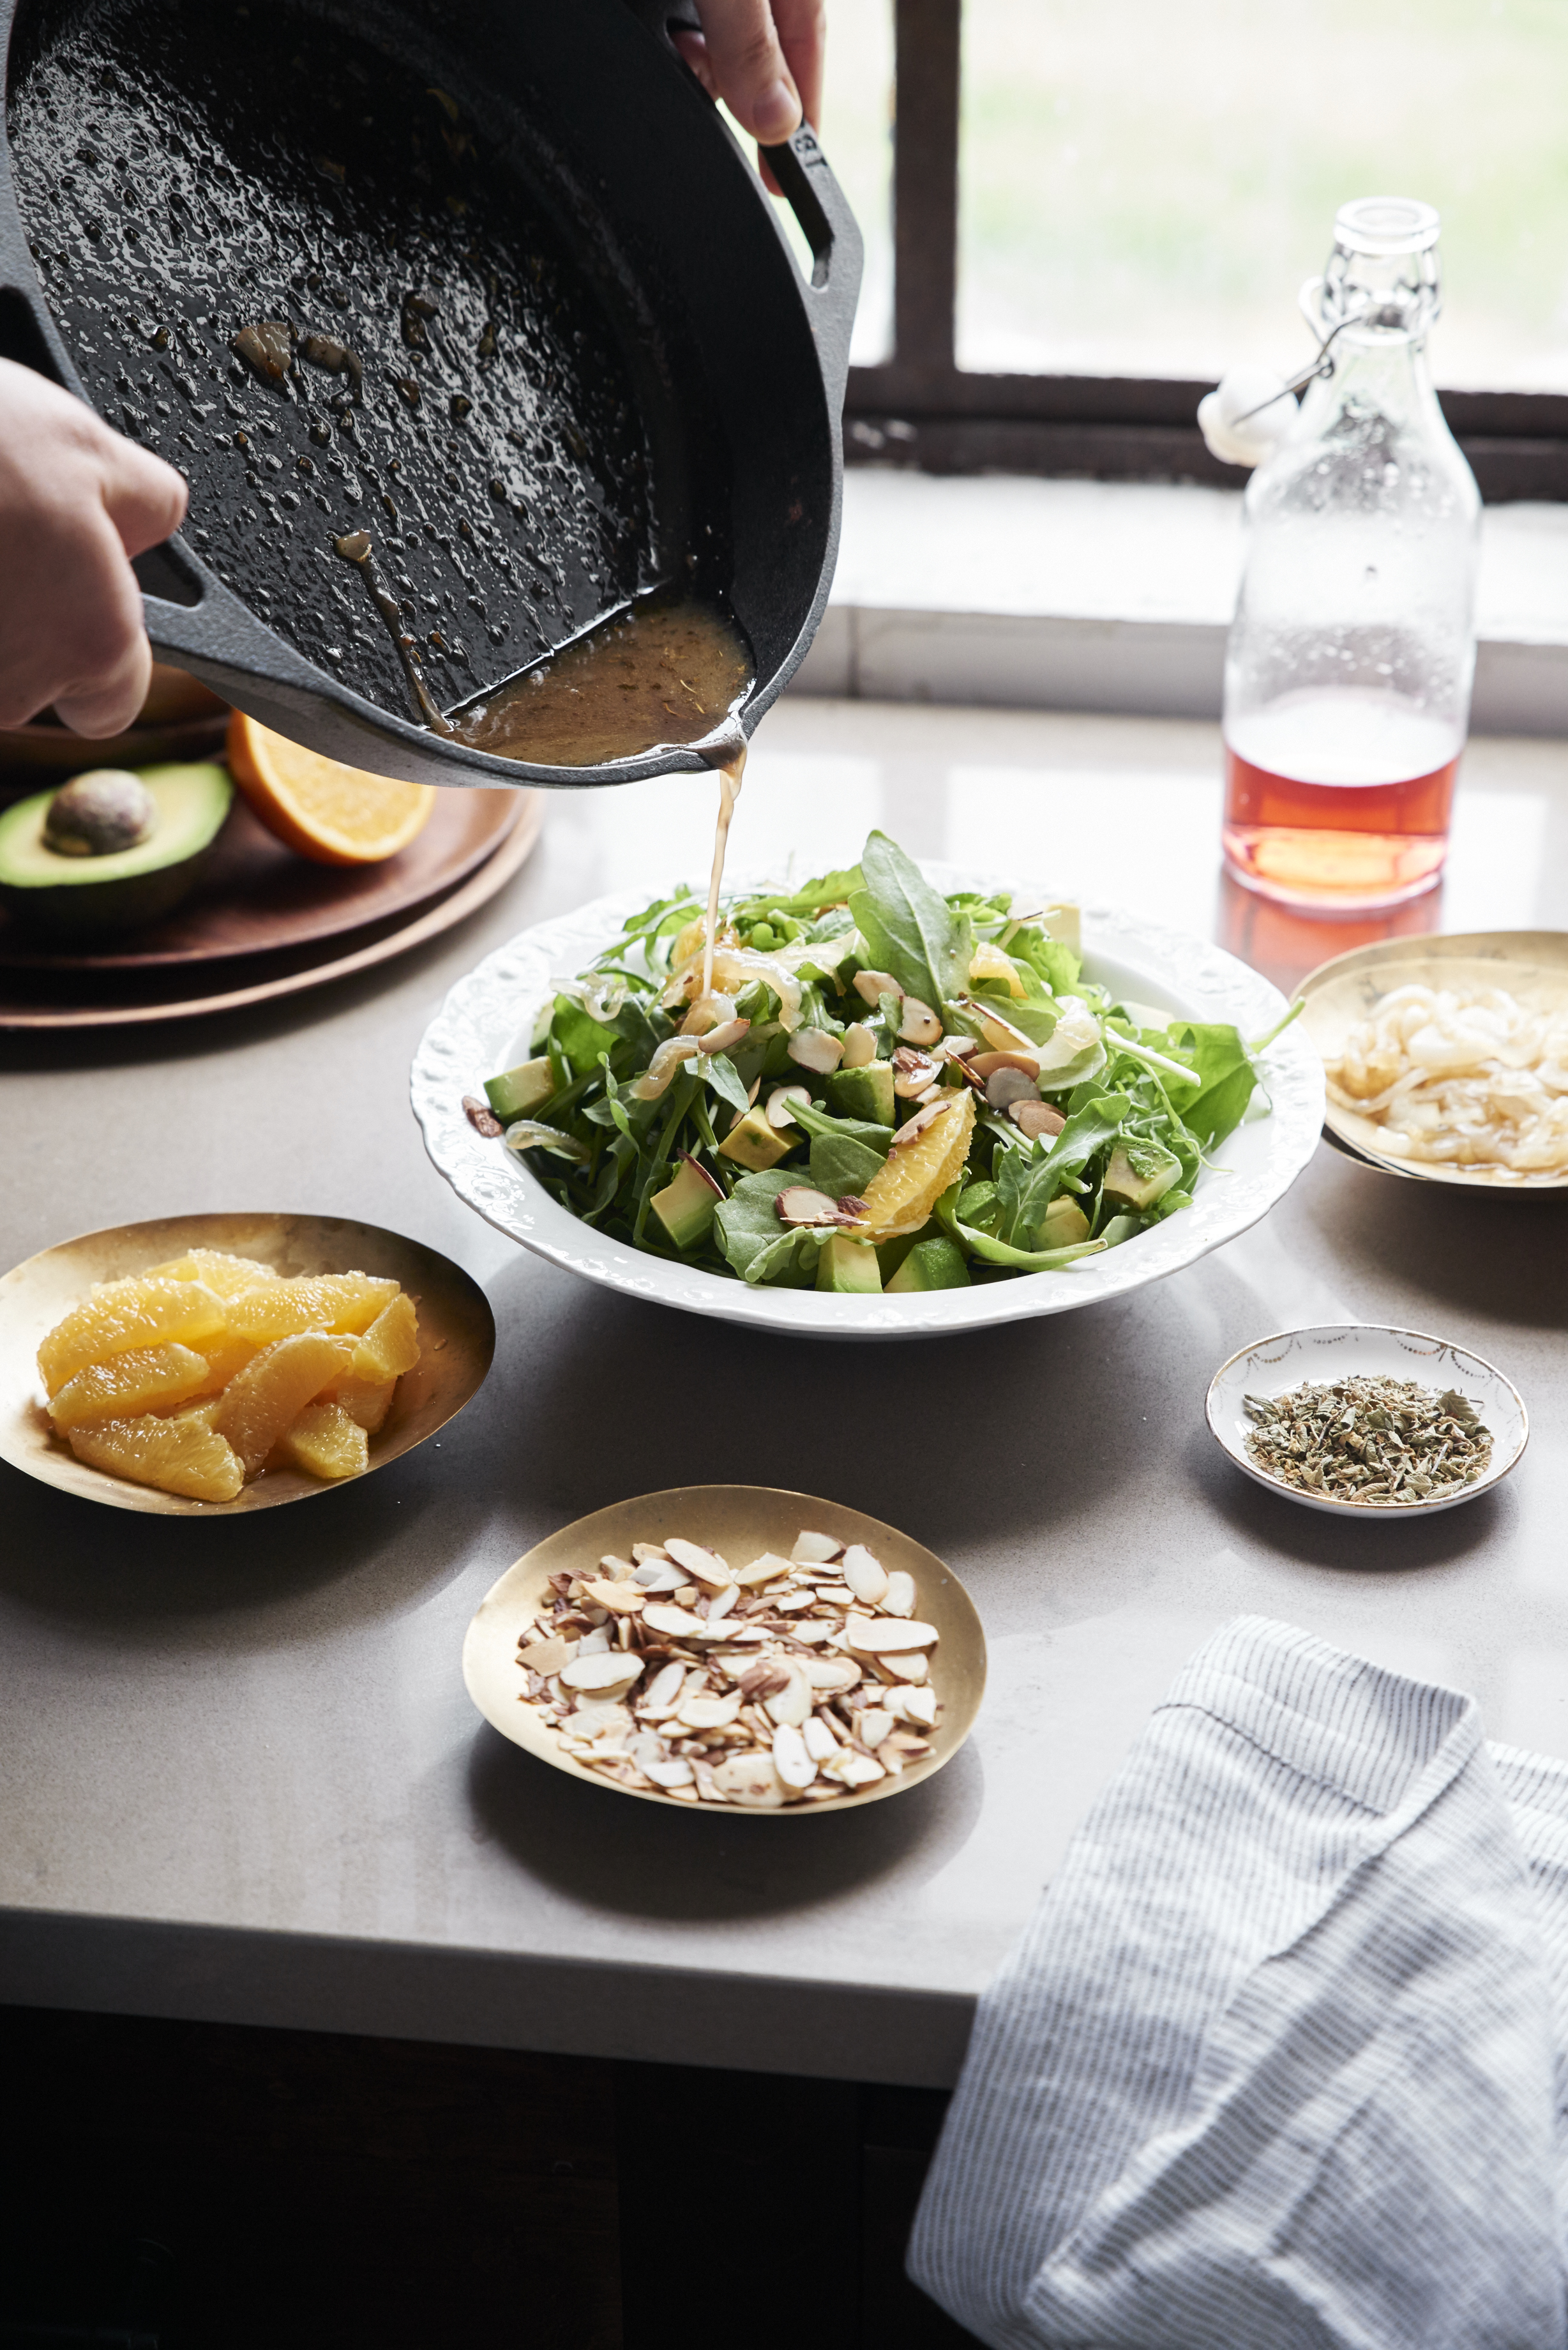
This is one of my favorite salads, a perfect combo of greens and citrus, avocado and crunchy almonds.

When the warm olive oil, onion, brown sugar, and red wine vinegar dressing is poured over, the greens wilt and the flavors combine. The cast-iron skillet is a handy way to toast nuts quickly and bring out their rich flavors. As the skillet is already in-use, turn the dressing ingredients into it, and you’ve got only one pan to wash.


ARUGULA SALAD WITH ORANGE AND SWEET PAN DRIZZLE RECIPE:

Makes: 6 servings | Prep: 25 to 30 minutes


6 cups fresh arugula or spinach leaves
1/4 cup sliced almonds
1 large navel orange, halved
1 ripe avocado, cut into 1/2-inch cubes
2 tablespoons olive oil
1/2 cup thinly sliced Vidalia or sweet onion
2 tablespoons red wine vinegar
1 tablespoon light brown sugar
Salt and freshly ground black pepper to taste
1/4 teaspoon dried oregano

  1. Place the arugula or spinach in a large bowl, and set aside.

  2. Place the almonds in a 12-inch skillet over medium heat and cook and stir until they just begin to brown, 4 to 5 minutes. Turn out onto a plate, and set them aside.

  3. Peel one half of the orange, and separate into sections. Cut each section into three pieces. Place the orange pieces on top of the spinach. Set the other half of orange aside for the dressing. Place the avocado cubes on top of the orange pieces. Set the bowl aside.

  4. Place the olive oil in the skillet. Add the onions, and sauté over medium heat until the onions begin to brown and are translucent, 6 to 7 minutes. Squeeze the juice from the reserved orange half into the pan. Add the vinegar, and stir. Reduce the heat to low, and stir in the brown sugar. Season with salt and pepper and oregano.

  5. Pour the hot pan dressing over the spinach, orange and avocado. Toss to combine. Add more olive oil if needed, season with salt and pepper, and garnish the top with the toasted almonds. Serve at once.

Kitchen Sink Tabbouleh

Kitchen Sink Taboulleh.jpg

Kitchen Sink Tabbouleh

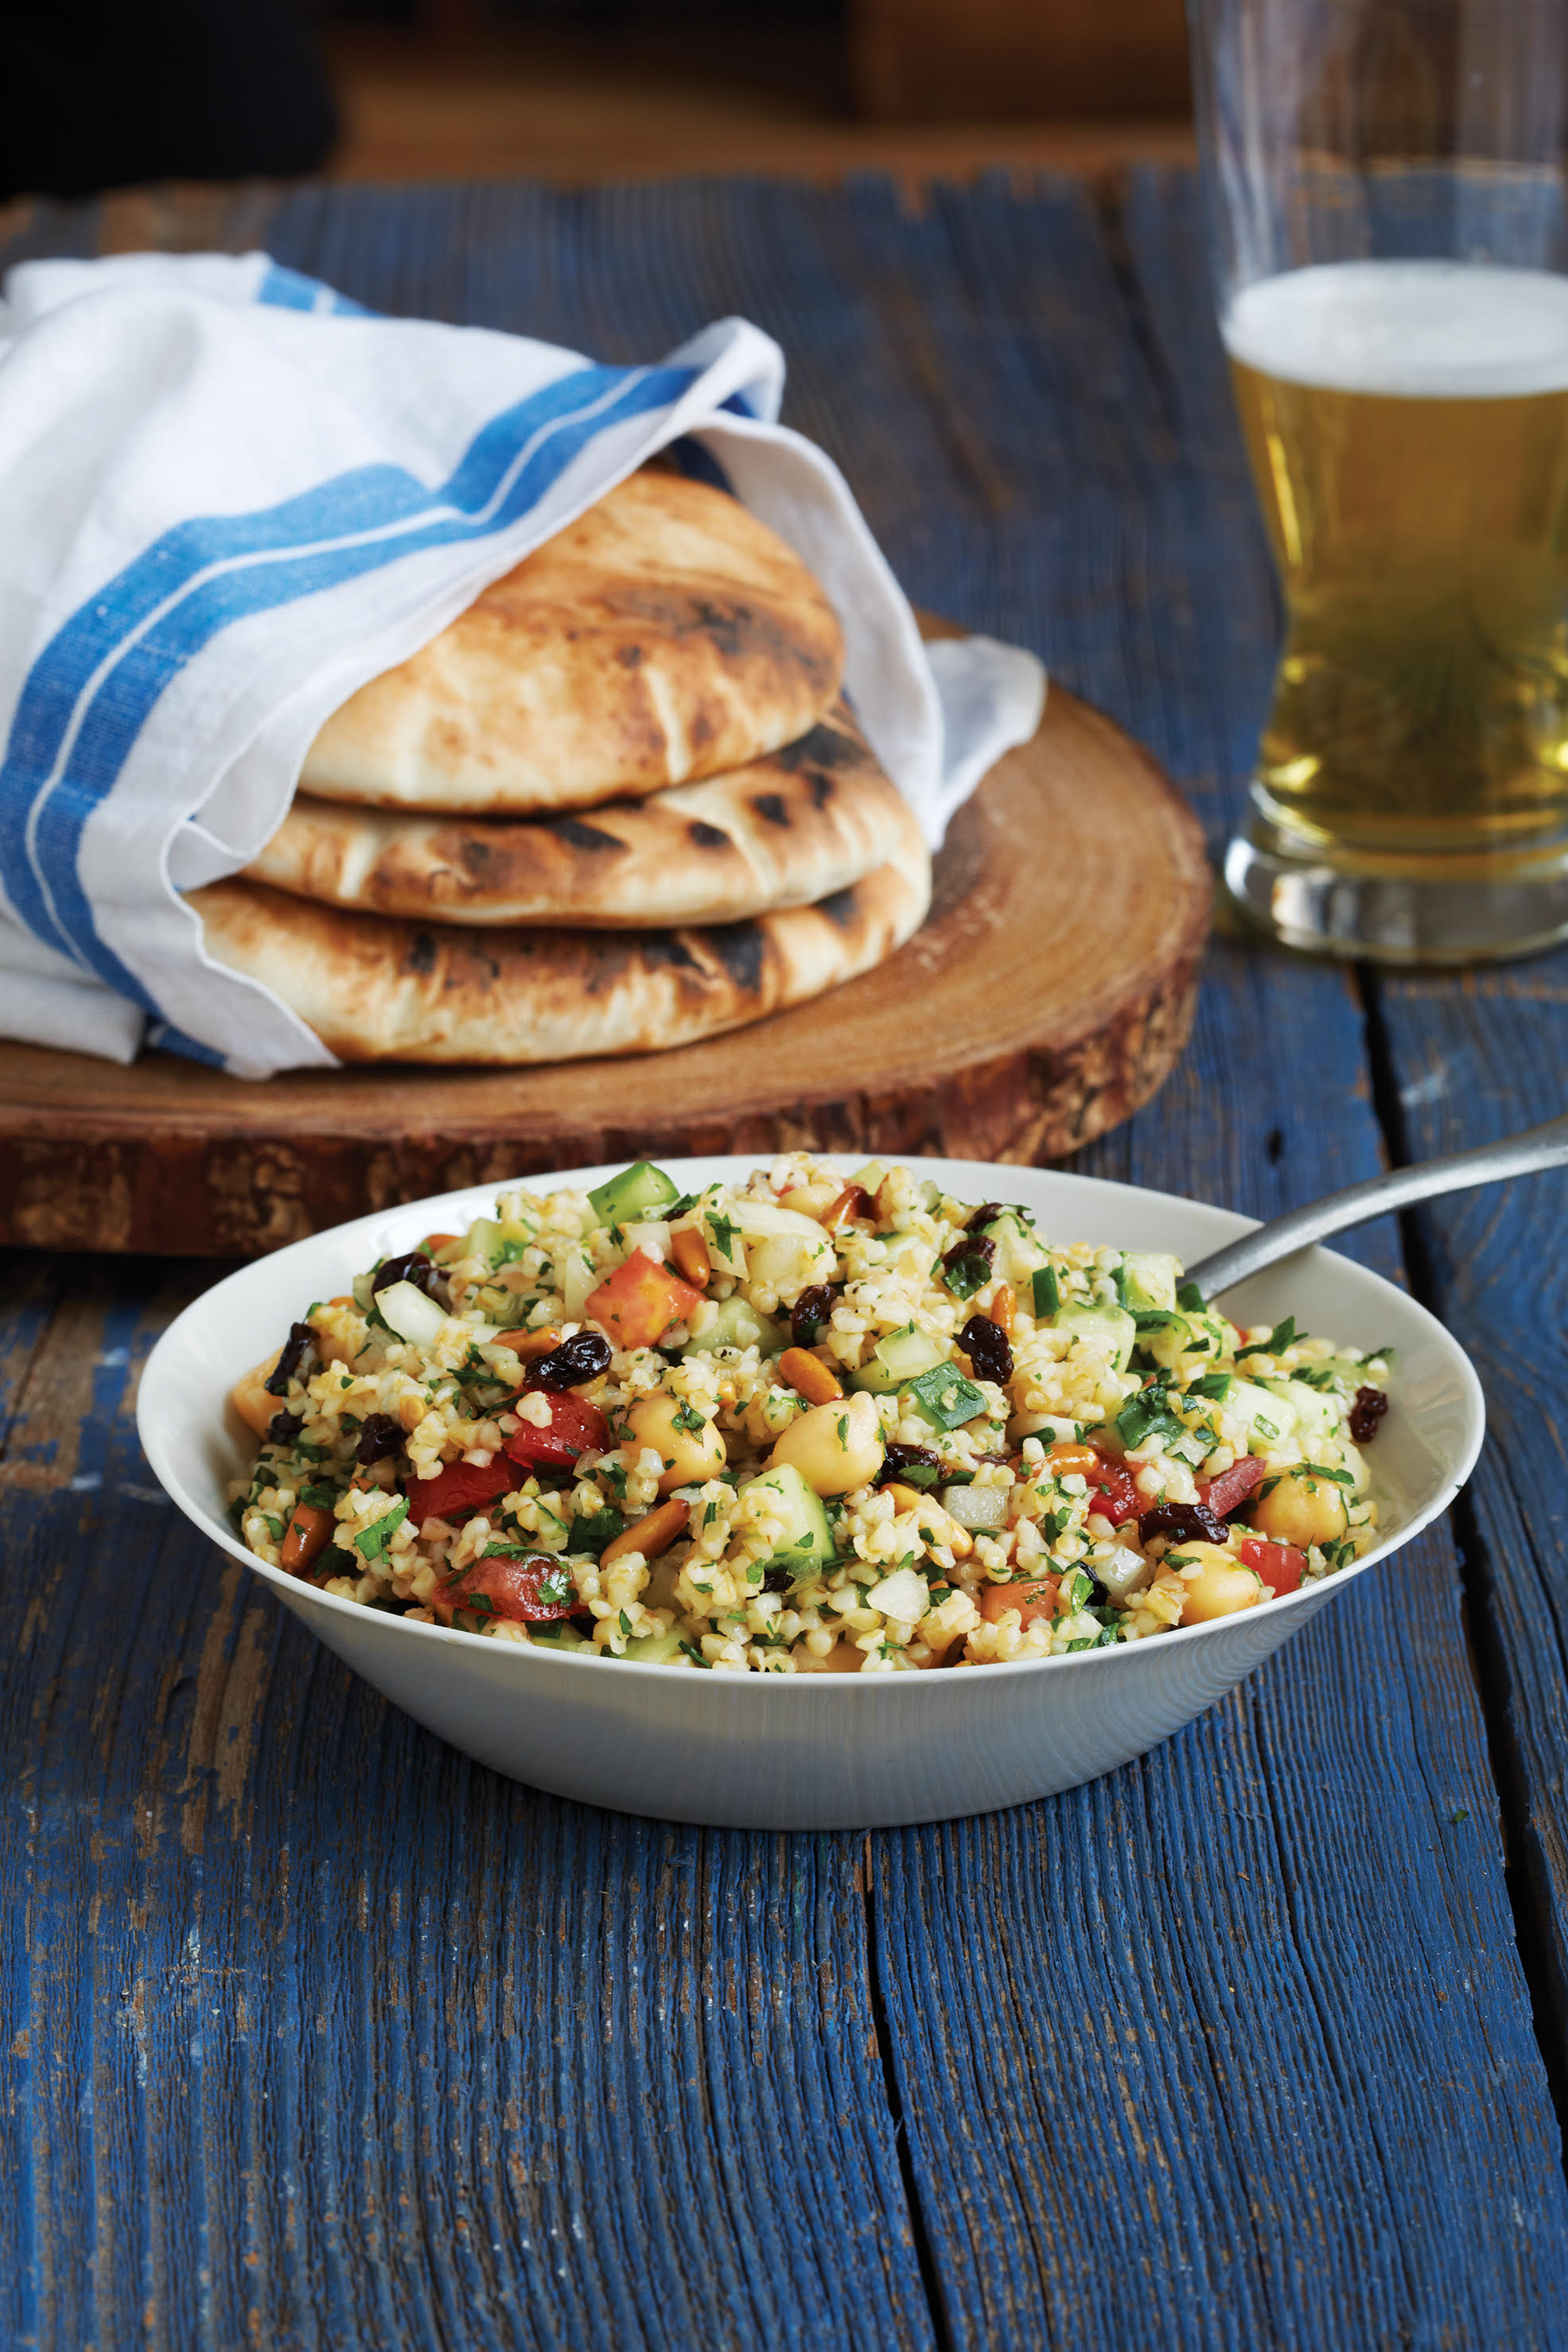
I love the kitchen-sink concept of cooking. Look in the pantry and the fridge, see what ingredients need to be used up, and toss them in the recipe! I first tried it in cookies, adding everything under the sun - pecans, cranberries, oatmeal - to chocolate chip cookies. And now I am moving to tabbouleh.

For me, the store-bought tabbouleh mixes are ho-hum. It is just as easy to make your own by pouring boiling water over coarse cracked wheat and then you can clean out your fridge and add anything you like. Chopped tomatoes and cucumbers, currants, toasted pine nuts, garbanzo beans or white beans, roasted eggplant cubes, caramelized onions, feta cheese - you name it. Leftovers go into brown bag lunches or can pair with grilled chicken or fish for tomorrow night’s dinner.


KITCHEN SINK TABBOULEH RECIPE:

Makes: 8 servings | Prep: 30 minutes | Soak: 1 hour

1 1/2 cups bulgur (coarse cracked wheat)
1 1/2 to 2 cups boiling water
1 cup chopped tomato
1 cup chopped peeled cucumber
1/2 cup chopped green onions or sweet onion
1 clove garlic, minced
1/4 cup fresh lemon juice (from 2 lemons)
3/4 cup extra-virgin olive oil
Salt and freshly ground black pepper
1 cup canned chickpeas (garbanzo beans), rinsed and drained
1/3 cup currants or chopped raisins
1/3 cup pine nuts, lightly toasted
1/2 cup chopped flat-leaf parsley
1/4 cup chopped fresh mint

  1. Place the bulgur in a strainer and rinse it under warm running water. Transfer the bulgur to a large heatproof bowl and pour 1 1/2 cups boiling water over it. Let the bulgur sit for about 30 minutes and if the water hasn’t been totally absorbed and the bulgur hasn’t softened enough, add 1/2 cup more boiling water and let it sit 15 to 30 minutes longer.

  2. Stir the bulgur to make sure it has absorbed all the water. If not, drain off the excess. Add the tomato, cucumber, green onions, and garlic. Stir to combine. Pour the lemon juice and olive oil over the top and stir to combine. Season with salt and pepper to taste.

  3. Fold in the chickpeas, currants, pine nuts, parsley and mint and serve.


To toast the pine nuts, place them in a cast-iron skillet over medium-low heat and cook until they just take on a little brown color, about 3 to 4 minutes.

Tomato Salad with Roasted Garlic Dressing

Tomato Salad with Roasted Garlic Dressing

IMG_1494.JPG

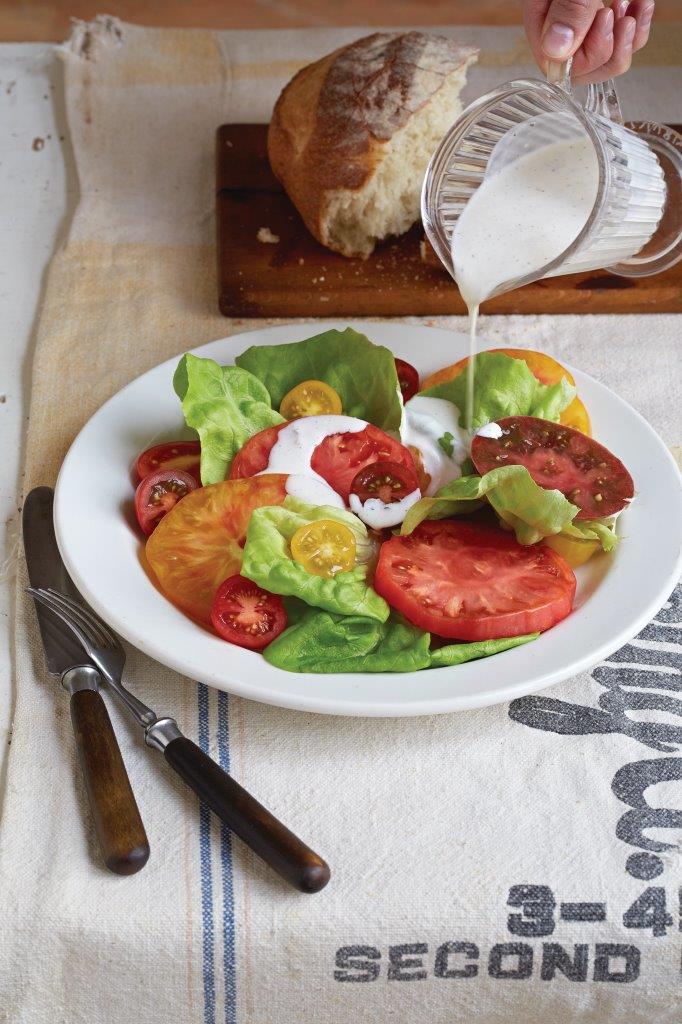
This is one of my favorite ways to serve sliced ripe summertime tomatoes. Or, serve good tomatoes no matter when you can get them. For an even more beautiful plate, choose red, yellow, and sweet green tomatoes. Add cherry tomatoes for variety.

The dressing is fabulous, and full of roasted fresh garlic, but it is not so heavy to not let the tomatoes or the salad greens or grilled asparagus or whatever it is on the plate to be the star. It is also wonderful spooned alongside grilled chicken, mushrooms, a filet of beef, the list goes on.

For company, prep this recipe in steps. Do the dressing the day before, and you can roast the garlic the day before that!


TOMATO SALAD WITH ROASTED GARLIC DRESSING RECIPE:

Serves: 6 | Prep: 25 minutes | Bake: 45 minutes | Cool: 20 minutes | Chill: 30 minutes

Roasted Garlic Dressing:
1 head garlic
1 tablespoon olive oil
1/2 cup mayonnaise
1/4 cup buttermilk
1/4 cup grated Parmesan cheese
1 tablespoon fresh lemon juice
1/2 teaspoon Worcestershire sauce
1/4 teaspoon hot sauce
Salt and freshly ground black pepper to taste

Salad:
6 to 8 Bibb lettuce leaves, rinsed and patted dry
3 to 4 large ripe tomatoes
1 tablespoon chopped parsley, if desired

  1. Preheat the oven to 400 degrees F.

  2. Make the Roasted Garlic Dressing: Cut 1/2 inch off the top of the head of garlic so garlic cloves are exposed. Place the garlic head on a square of aluminum foil and drizzle the olive oil over the top of the garlic. Pull the sides of the foil up around the garlic to encase it. Place the foil-wrapped garlic on the oven rack and bake the garlic until tender, about 45 minutes.

  3. Remove the foil-wrapped garlic from the oven and open the foil so the garlic can cool enough to handle, about 20 minutes.

  4. Holding the head of the garlic upside-down over a bowl, squeeze out the cloves of garlic. Using a fork, mash the garlic until smooth. Add the mayonnaise, buttermilk, Parmesan, lemon juice, Worcestershire, and hot sauce and whisk until smooth. Season the dressing with salt and pepper to taste. Cover the bowl with plastic wrap and chill 30 minutes, or until time to serve.

  5. Make the salad: Arrange the lettuce leaves on a serving platter. Peel and slice the tomatoes and arrange them on top of the lettuce. When ready to serve, drizzle the dressing over the tomatoes and garnish with parsley, if desired.


Leftovers? The dressing keeps, chilled, up to 5 days.

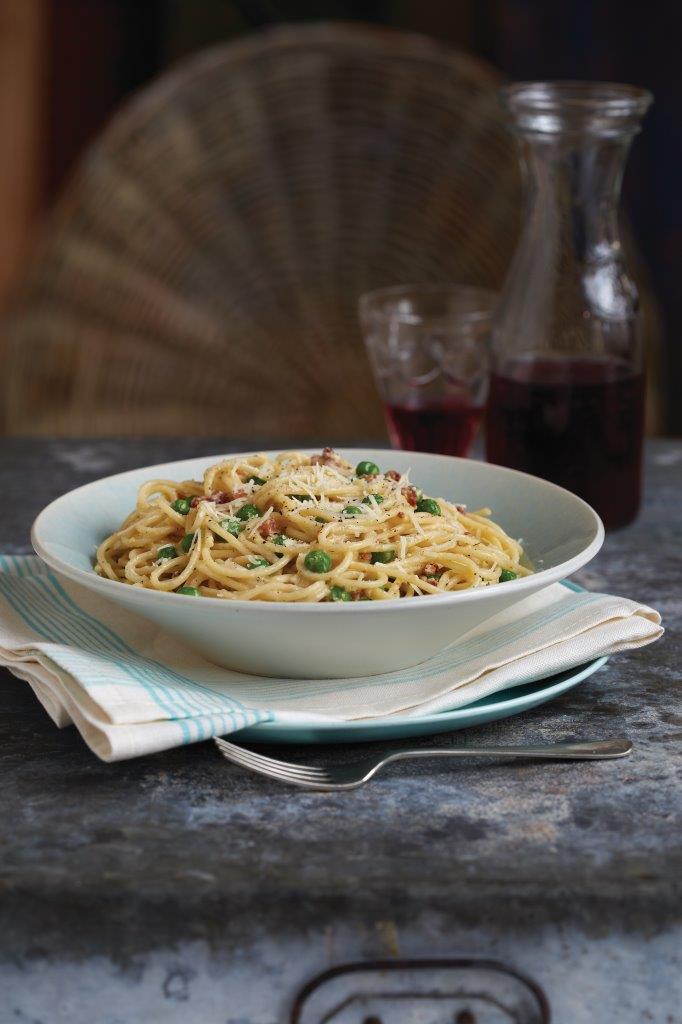
Shellie's Spaghetti Carbonara

Shellie's Spaghetti Carbonara.jpg

Shellie’s Spaghetti Carbonara

My high school friend Shellie Unger is a fabulous cook. I remember her mother growing fresh herbs and preserving fruit in brandy during those stodgy casserole years of the South when few cooks prepared food that was out of the ordinary. Shellie took her mother’s creativity in the kitchen and added her own flourishes and practicality from working for years as an executive for Vanguard, raising two children, and traveling with her family.

Shellie says her go-to recipe that her kids request when they come home to Pennsylvania to visit or when she needs to impress friends quickly is her Spaghetti Carbonara. She studied various recipes, then perfected her own. On a trip to London she and her son Trey ordered this as a brunch appetizer and baby peas were added, so now she adds peas.  Shellie says this recipe originated in the coal-mining region of Italy.

Pancetta is Italian bacon, and you can find it at delis that specialize in Italian ingredients. Or you can use thick-sliced bacon. Shellie and I both agree to splurge on the good Parmesan cheese, using Parmigiana-Reggiano or grana.

SHELLIE’S SPAGHETTI CARBONARA RECIPE:

Makes: 4 servings | Prep: 15 to 20 minutes | Cook: 7 to 8 minutes

 6 quarts water
2 tablespoons salt
2 tablespoons olive oil or butter (or combination of the two)
6 to 8 ounces pancetta, chopped
2 cloves garlic, peeled and left whole
1 pound spaghetti
4 large eggs, at room temperature
1¼ cups grated good Parmesan cheese, (see Notes)
Freshly ground black pepper to taste
½ to ¾ cup frozen baby peas, thawed
Reserved ¼ cup pasta water 

  1. Bring the 6 quarts water to a boil in a large pot, and add the salt.

  2. Meanwhile, place the olive oil or butter in a large skillet with pancetta and whole garlic cloves. Cook over medium-high heat until the pancetta renders its fat but is not crisp, 3 to 4 minutes. Discard the garlic cloves and remove the pan from the heat. Do not drain the fat.

  3. When the water is boiling, add the pasta, and stir to separate the spaghetti. Lower the heat to medium, and let the pasta cook at a simmer until al dente, 6 to 7 minutes.

  4. While the pasta cooks, break the eggs into a large shallow bowl. Whisk until the yolks and whites are just combined. Add 1 cup of the Parmesan, the cooled pancetta and drippings, and a generous grinding of black pepper.

  5. When the pasta has cooked, drain the pasta (reserving ¼ cup pasta cooking water) and turn it into the bowl with the egg mixture. Toss until the egg sauce cooks and the pasta is well coated. Add the reserved pasta water as needed so the strands of spaghetti do not stick together. Fold in the peas.

  6. Serve at once with the extra Parmesan for topping.


Do ahead: While this is a last-minute recipe, you can pre-chop the pancetta and place it back in the fridge, peel the garlic cloves, thaw the peas, and grate the Parmesan. If you want to reheat leftovers, save a little extra pasta cooking water to pour over the top.


Bebe's Green Beans

Bebe’s Green Beans

southern_veggies_013.JPG


I live in the land of the meat and three. That is Nashville's claim to fame - along with hot chicken and of course, country music. Meat and three means you pick one meat offering and a trinity of veggie sides to go with it. There's nothing profound about the history of this way of serving up hot southern food in restaurants and diners - it was an efficient method to keep the line moving, I suppose.

And this way of selling southern food surely is rooted in the home where you might have a pork chop or piece of fish and three vegetables alongside. My mother didn't think she had prepared an adequate meal unless there were at least three vegetables, plus hot bread and dessert. Those were the days...

However, we've woken up to the fact that the way we've cooked southern veggies may taste good but isn't good for us. My apologies to the southern chefs and authors who have espoused the gastronomic pleasure of greens dripping in pork fat, okra fried in bacon grease, and squash swimming in butter. I am going to tell you right here and now that there is a better way to cook those garden veggies, a way that respects their natural and local flavor, is still pleasing to the palate, and will have full approval of your cardiologist. If you are with me, read on. If not, go get in line at your favorite meat and three.

Lessons learned from the past

The reason green beans were originally simmered in pork fat is that fatty meat was available on a farm that raised hogs. The salty, rich flavor of the pork made those beans flavorful, and the fat made them substantial.

According to Virginia historian Leni Sorenson, southern food history is rooted in economy. "The poor didn't eat desserts, couldn't buy sugar... they made do with field peas." And she adds, "They wanted fat meat like pork for sustenance."

Those beans or peas simmered in a pot with water and pork was the main dish. That hog jowl, the fatback, whatever you call it, was added to give everyone the feeling of satiety. Plus, it added more calories to vegetables, which increased the amount of energy that could be expended in fields or factories until the next meal. But we don't live that way anymore, and there is a better and more delicious way to cook green beans.

Cook in as little water as possible

A modern way to prepare green beans is on top of the stove in just enough water to cover the beans halfway. They are cooked through and not crisp. Most importantly, they are free of animal fat. This is a method my mother developed out of creativity and the need to put something healthier on the dinner table. The uncanny mix of olive oil, onion, brown sugar, salt, and pepper gets magically smoky and seasons the beans in a most satisfying way.


BEBE’S GREEN BEANS RECIPE:

Makes 6 servings | Prep: 15 to 20 minutes | Cook: 20 to 25 minutes

1 1/2 pounds fresh green beans, trimmed
Water to cover halfway
1 cup chopped onion
1/4 cup olive oil
1/4 cup light brown sugar
Salt and pepper to taste

  1. Snap the trimmed green beans in half and place in a large saucepan. Add enough water to cover the beans only halfway. Add the onion, olive oil, brown sugar, and salt and pepper to taste - about 1/4 teaspoon each. Place the pan over medium-high heat, and bring to a boil. Reduce the heat, cover, and simmer until the beans are just tender, 20 to 25 minutes. Taste one of the beans to test for doneness. If you like beans cooked a little longer, keep cooking them until they are your desired doneness.

  2. Drain most, but not all, of the water from the pan. Season again with salt and pepper to taste. Serve, or let cool and store in the fridge until time to serve.


Grilled Eggplant Stacks

Grilled Eggplant Stacks

Eggplant recipes | Anne Byrn

Before my daughter’s wedding two years ago, we were looking for a first-place course for the reception dinner, a starter to the meal that could be plated and placed on the table in advance. It needed to be a course that was delicious at room temperature, and one that would actually improve in flavor as the seasonings and ingredients had time to mingle together on the plate.

Enter Eggplant Stacks!

It was this very recipe — a stack of grilled eggplant slices and tomato, seasoned with a fresh basil oil and adorned with crumbled feta. I love this recipe because it saved my day when planning that wedding meal, and also because it’s delicious any day, alone or alongside a grilled steak or piece of chicken. And when you’ve got really good tomatoes, one bite of this stack says summertime.


GRILLED EGGPLANT STACKS RECIPE:

Makes: 6 to 12 servings | Prep: 35 to 40 minutes | Grill: 7 to 8 minutes | Bake: 6 to 7 minutes

Basil Oil:
1 cup fresh basil leaves
1/2 cup olive oil
1/2 teaspoon salt

Eggplant Stacks:
2 large or 3 medium eggplants (2 to 3 pounds; 24 slices)
Salt and freshly ground black pepper
3 large tomatoes (for 12 slices total)
3/4 cup (6 ounces) crumbled feta cheese
Arugula, for serving

  1. Make the basil oil: Place the basil leaves, olive oil, and 1/2 teaspoon salt in a food processor. Process the basil until it is finely chopped. Line a sieve with paper towels and place it over a bowl. Pour the basil and oil mixture onto the paper towels and press gently on the mixture to extract the oil from the basil. About 1/3 cup of basil oil will seep into the bowl. Set aside 1 tablespoon of the basil oil for garnishing the stacks. Set aside the chopped basil leaves on the paper towels.

  2. Make the eggplant stacks: Preheat the grill to medium-high. Or, preheat an indoor stovetop grill.

  3. Trim the ends off the eggplants, then cut them into 24 slices that are a little less than 1/2-inch thick. Brush the eggplant slices on both sides with the basil oil and season with salt and pepper to taste. Grill the eggplant slices until they soften and are crisp around the edges, 7 to 8 minutes, turning once. Transfer the grilled eggplant to a platter.

  4. Preheat the oven to 400 degrees F.

  5. Cut the tomatoes into 12 slices, each about 1/3-inch thick, discarding the end slices or setting them aside for another use.

  6. For 12 short stacks, select 12 large slices of grilled eggplant and place them on a baking sheet. Spread each with 1/2 teaspoon of the reserved chopped basil. Top each with a slice of tomato and add a generous spoonful of feta cheese. Top the cheese with another eggplant slice and finish the stack with another heaping tablespoon of feta.

  7. Place the baking sheet in the oven and bake the stacks until the eggplant is warmed through and the feta has melted slightly, 6 to 7 minutes.

  8. To serve, place the eggplant stacks on a long platter, or place them on a bed of arugula on the platter. Drizzle the reserved 1 tablespoon basil oil over the stacks.


For taller stacks: Use additional eggplant, tomatoes, cheese, and basil to make them higher. They will take a little longer to heat through. And you will need to make more basil oil, too. It can be made up to 6 hours in advance and left at room temperature.

Shrimp and Cheese Grits

Shrimp and Cheese Grits

Shrimp and Grits | Anne Byrn

There are as many ways to cook shrimp and grits as there are ways to roast a chicken. Which is why I love this recipe so much - you can leave your mark on it, make it your own just by doing something so simple as adding mushrooms, or using green onions and not white, or by lightly frying the shrimp first as is done in this wonderful version. Plus, the grits can simply be seasoned with butter or as we prefer with cheddar and garlic. This is the recipe my daughter wanted me to make for her 18th birthday party with friends. It is inspired from the first shrimp and grits I ever tasted in Charleston, S.C. With a big Caesar salad and birthday cake for dessert, the meal was simple, elegant, friendly, and fun.

Since then, I’ve made shrimp and grits even more ways, most recently in a cast-iron skillet. I simmer the grits until done in a saute of onion and peppers, add the cheese, then nestle in peeled, deveined raw shrimp and place the skillet in the oven. The shrimp poach in the warm grits, and the flavor is fabulous!


SHRIMP AND CHEESE GRITS RECIPE:

Makes 6 servings | Prep: 25 to 30 minutes | Cook: 10 to 15 minutes

1 1/2 pounds large shrimp, peeled and deveined
Salt and freshly ground black pepper to taste
2 tablespoons all-purpose flour
1/4 cup olive oil or vegetable oil
2 tablespoons butter
1 cup sliced mushrooms
1/2 cup sliced red bell pepper
2 to 3 cloves garlic, sliced
1/3 cup chopped green onion
1 cup chopped fresh tomato
1/2 cup chicken broth
1 tablespoon fresh lemon juice
Dash hot pepper or Worcestershire sauce
Chopped parsley or green onions, for garnish
Cheese Grits (see recipe)

  1. Place the shrimp in a small bowl and season with salt and pepper and toss with the flour. Set aside.

  2. Place the oil in a cast iron or other large skillet and heat over medium-high, and when hot add the shrimp a few at a time, and cook through, 1 to 2 minutes per batch. Remove to a plate and continue until the rest of the shrimp have cooked.

  3. Place the butter in the skillet over medium heat, and add the mushrooms, red pepper, garlic, and green onion. Cook, stirring until the mushrooms and peppers are soft, 5 to 6 minutes. Add the tomatoes, chicken broth, lemon juice and hot sauce or Worcestershire sauce. Add the shrimp and their cooking juices back to the pan. Stir and cook over medium-high heat until the tomatoes cook out some of their liquid, and the shrimp cook all the way through, 2 to 3 minutes. Spoon shrimp over grits, and garnish with chopped parsley or green onions.


How to Make Cheese Grits: Follow cooking directions on the box or bag of grits. However, do not cook the grits in all water. Cook in half water and half milk. And add 1 to 2 cloves minced garlic to the cooking water, as well as salt and pepper. When the grits have cooked per instructions, add a tablespoon butter and a handful (1 cup) shredded mild cheddar cheese or a Manchego cheese. Taste for seasoning. Add more butter and cheese, if desired.

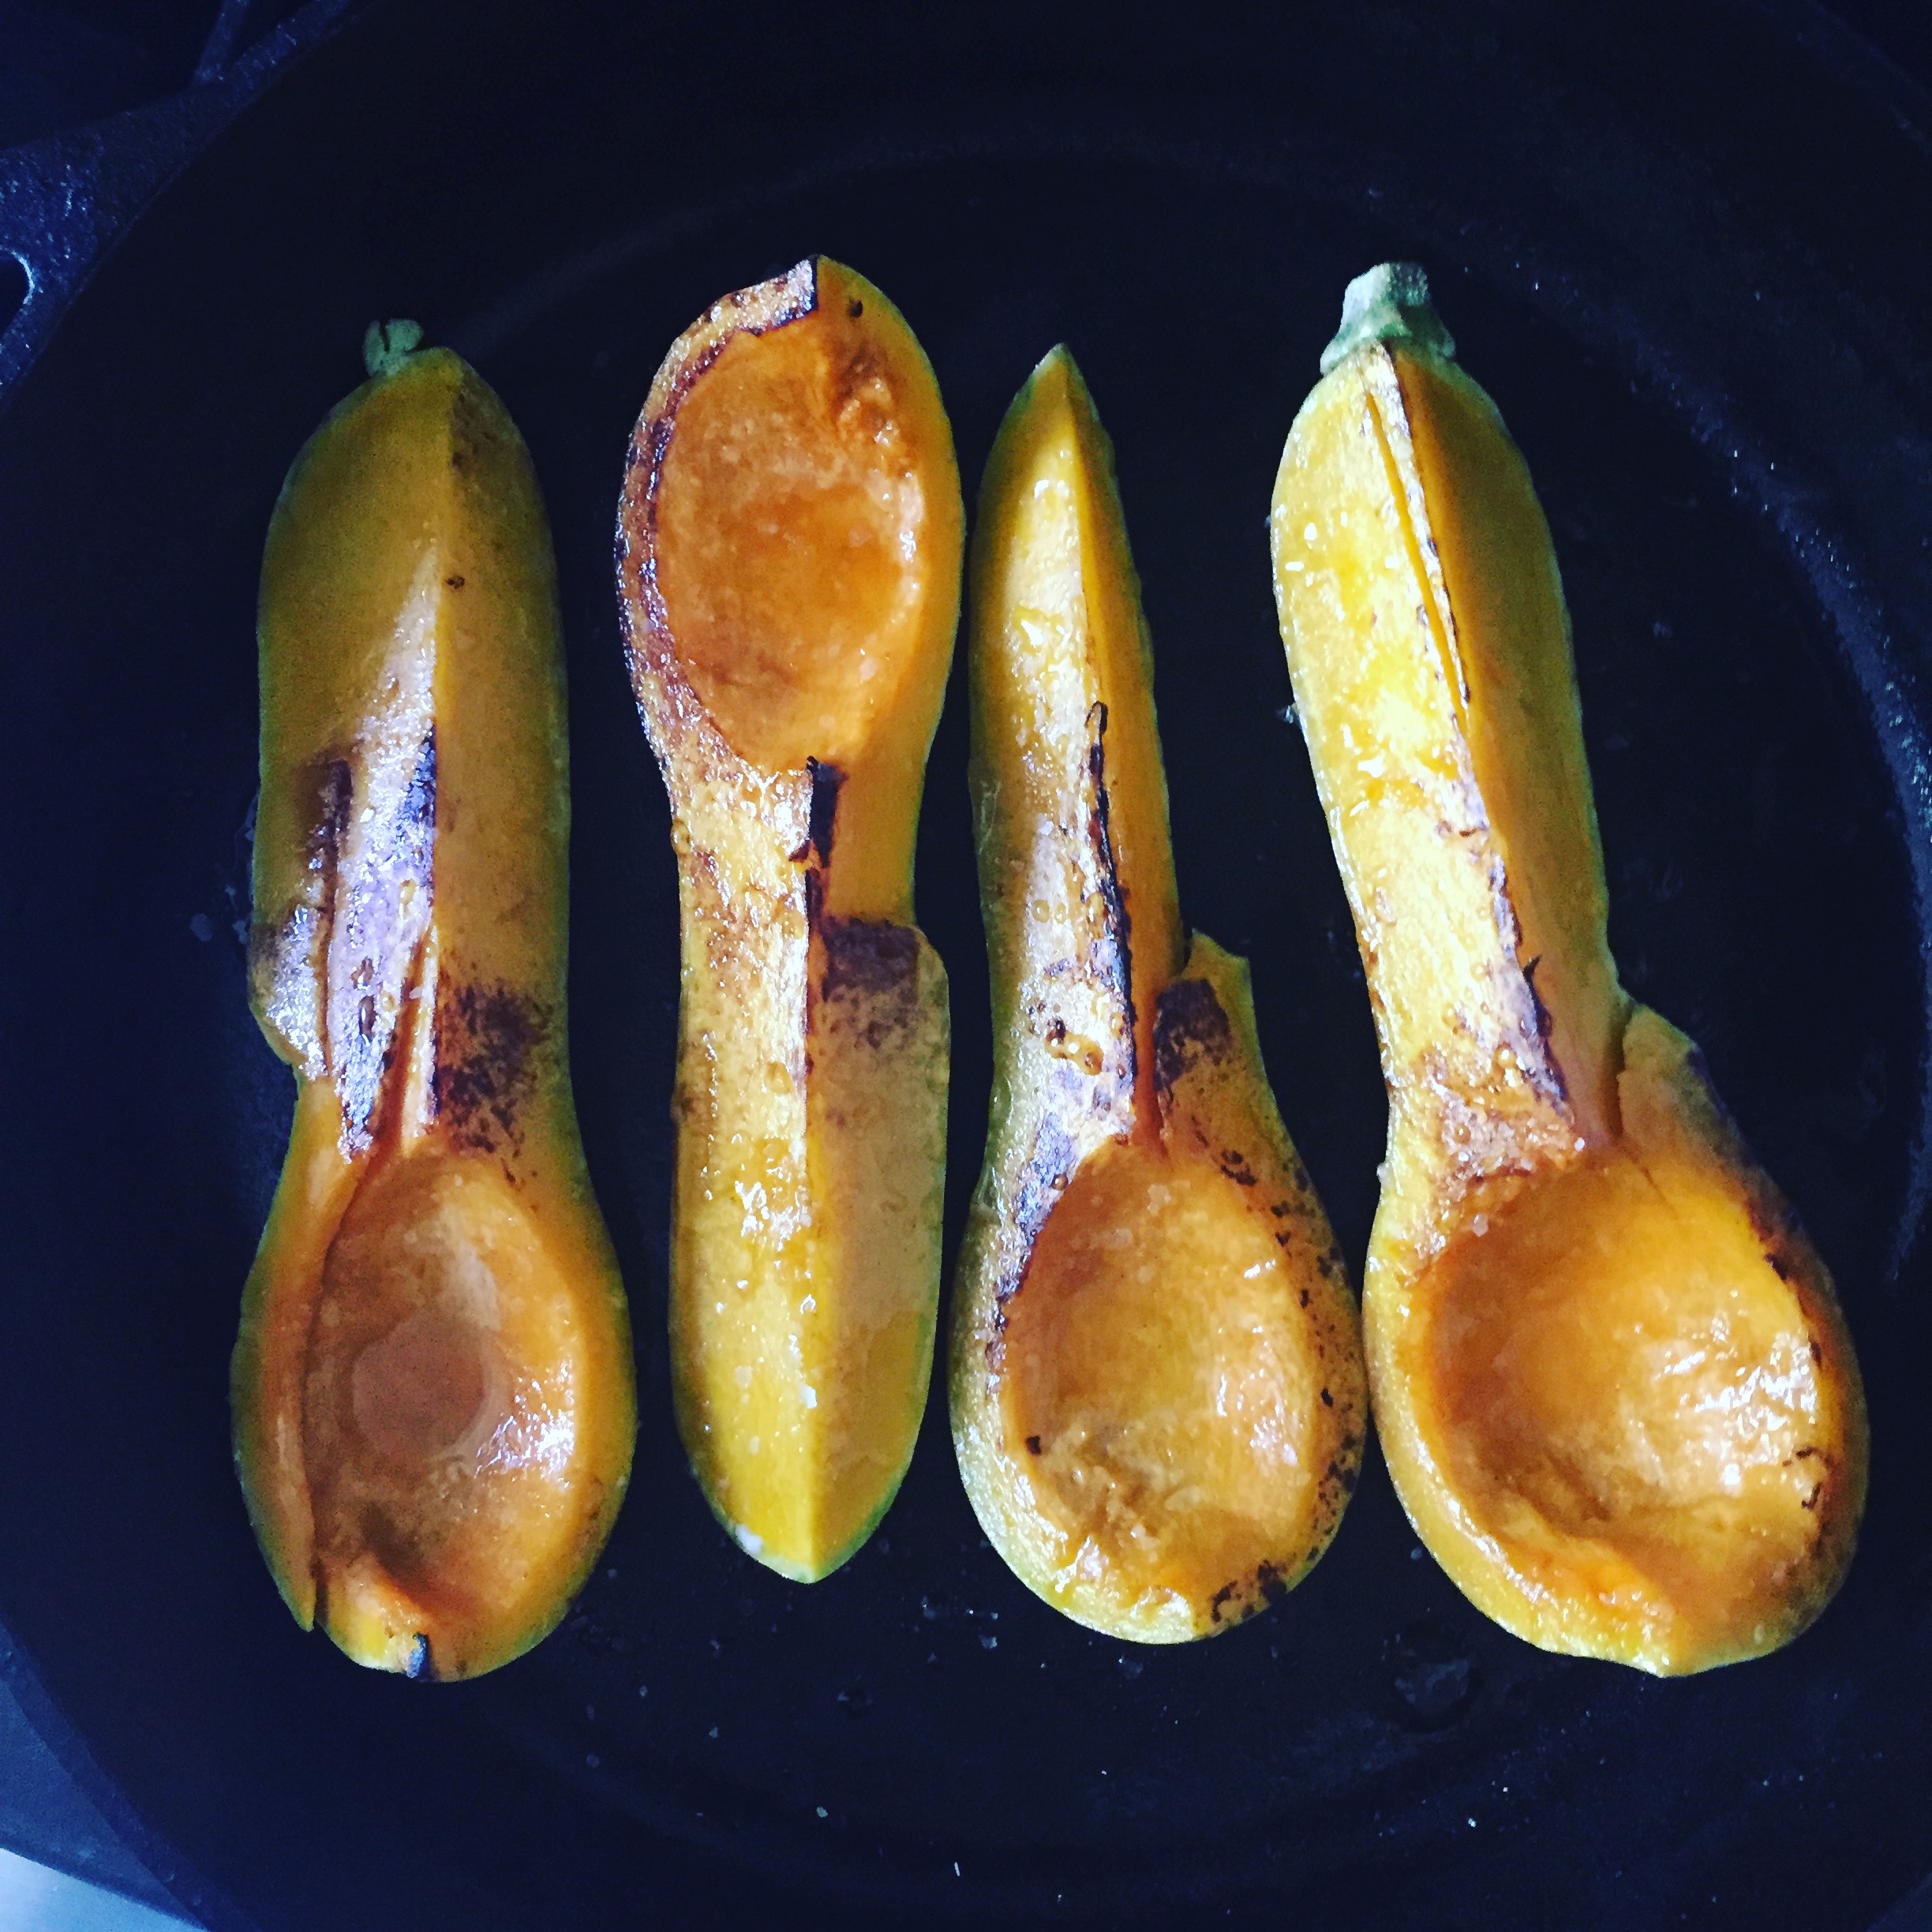
Roasted Butternut Squash

Roasted Butternut Squash

IMG_8628.JPG

Roasted winter squash like the butternut is so easy to prepare, you almost don’t need a recipe!

Wash the squash and cut trim off the stem end. With a heavy sharp knife, cut down through the squash to cut it in half lengthwise. With a soup spoon, scoop out the seeds and discard. Now comes the fun part - decide how you’re going to roast it. Will it be just the two halves, or do you slice again and cut each half into two quarters? Each quarter into two eighths?

This is as much an exercise in math as it is in cooking. And once the size is decided, think if you’re roasting on a sheet pan or in an iron skillet. If the former, then brush the wedges with oil, season as you like, pop in the oven and wait until browned. If the skillet, then heat a smidgeon of oil until hot, sear the squash cut-side down, then turn over for roasting to doneness in the oven.

One last thought - you can drizzle on something wonderful before the squash heads into the oven and out of your hands. Will it be honey, sorghum, or maple syrup? Will you drizzle with a little balsamic vinegar for depth and sweetness? Or will you get cozy and channel your grandmother and spoon on brown sugar, a bit of butter, and a sprinkle of cinnamon? So many delicious choices.


ROASTED BUTTERNUT SQUASH RECIPE:

Makes: 4 to 6 servings | Prep: 5 minutes | Cook: 35 to 40 minutes

1 large butternut squash (about 1 1/2 to 2 pounds)
Olive oil as needed
Kosher salt and freshly ground black pepper
Honey, sorghum, or maple syrup

  1. Place a rack in the center of the oven, and preheat the oven to 375 degrees F.

  2. Trim off the stem end of the squash. With a big, heavy chef’s knife, slice the squash in half lengthwise. Scoop out the seeds and discard. Place the halves on a sheet pan and brush with olive oil. Sprinkle with salt and pepper. Or, cut into quarters, brush with oil, and season. If using an iron skillet, heat the skillet until hot, drizzle in a teaspoon of oil, and sear the cut edges until browned. Season with salt and pepper.

  3. Turn the squash right side up, and drizzle honey, sorghum, or maple syrup into the well of the squash. Place the pan in the oven. Bake until the squash is tender when pierced with a fork, about 35 to 40 minutes, depending on the size.

  4. Serve warm or at room temperature. Or, let the squash cool and scoop the roasted squash into any recipe that calls for canned pumpkin.

Sheet Pan Roasted Okra

Sheet Pan Roasted Okra

southern_veggies_029.JPG

When okra comes into season there is no need to coat it with breading and fry in oil. Let the true flavor come to life by slicing lengthwise or into thirds or however you like, then tossing with olive oil, and a pinch of salt - not much - and roast at 400 degrees on a sheet pan until browned and tender.

Season at the end of the roasting process - this is important. Salting ahead of time tends to over-salt the vegetable, as salt magnifies in flavor when roasting. So I will add a pinch of sea salt when tossing with olive oil, then taste the okra when they come out of the oven. If they need more salt, you can add it. And add minced onion if you like to add a sweet caramelized contrast. Add halved cherry tomatoes at the end for that wonderful okra-tomato marriage. Just make sure to cook at a high enough heat so the okra browns and then run a metal spatula under it and transfer it to a platter for pre-dinner snacking or to accompany steaks and mashed potatoes.

And if you’re feeling fancy, add a handful of chopped fresh parsley or basil to the finished dish to dress it up, and grate over some nice Manchego cheese as an intentional way to season and garnish - ways we can rethink the way we cook veggies!


SHEET PAN ROASTED OKRA RECIPE:

Makes: 6 to 8 servings | Prep: 10 to 12 minutes | Cook: 10 to 13 minutes


1 pound small to medium okra
2 to 3 tablespoons olive oil
1 tablespoon minced onion, if desired
Pinch of Creole seasoning
1 cup halved cherry tomatoes
3 springs of fresh thyme, if desired
Salt and pepper to taste

  1. Place a rack in the center of the oven, and preheat the oven to 400 degrees.

  2. Trim the stem end cap from the okra. If okra are small, leave them whole. If they are medium to large in size, slice in half lengthwise or cut them on the diagonal into two to three pieces. Place the okra in a large mixing bowl, and toss with the oil, onion, and the Creole seasoning. Turn the mixture onto a rimmed half sheet pan, and spread out the okra so that it is in one layer. Place the pan in the oven.

  3. Roast the okra until it just begins to turn brown around the edges, about 7 to 8 minutes. Add the tomatoes to the pan, and add the thyme if desired. Continue to roast until the okra is turning golden brown, about 3 to 5 minutes more. Remove the pan from the oven, and season with salt and pepper while warm.

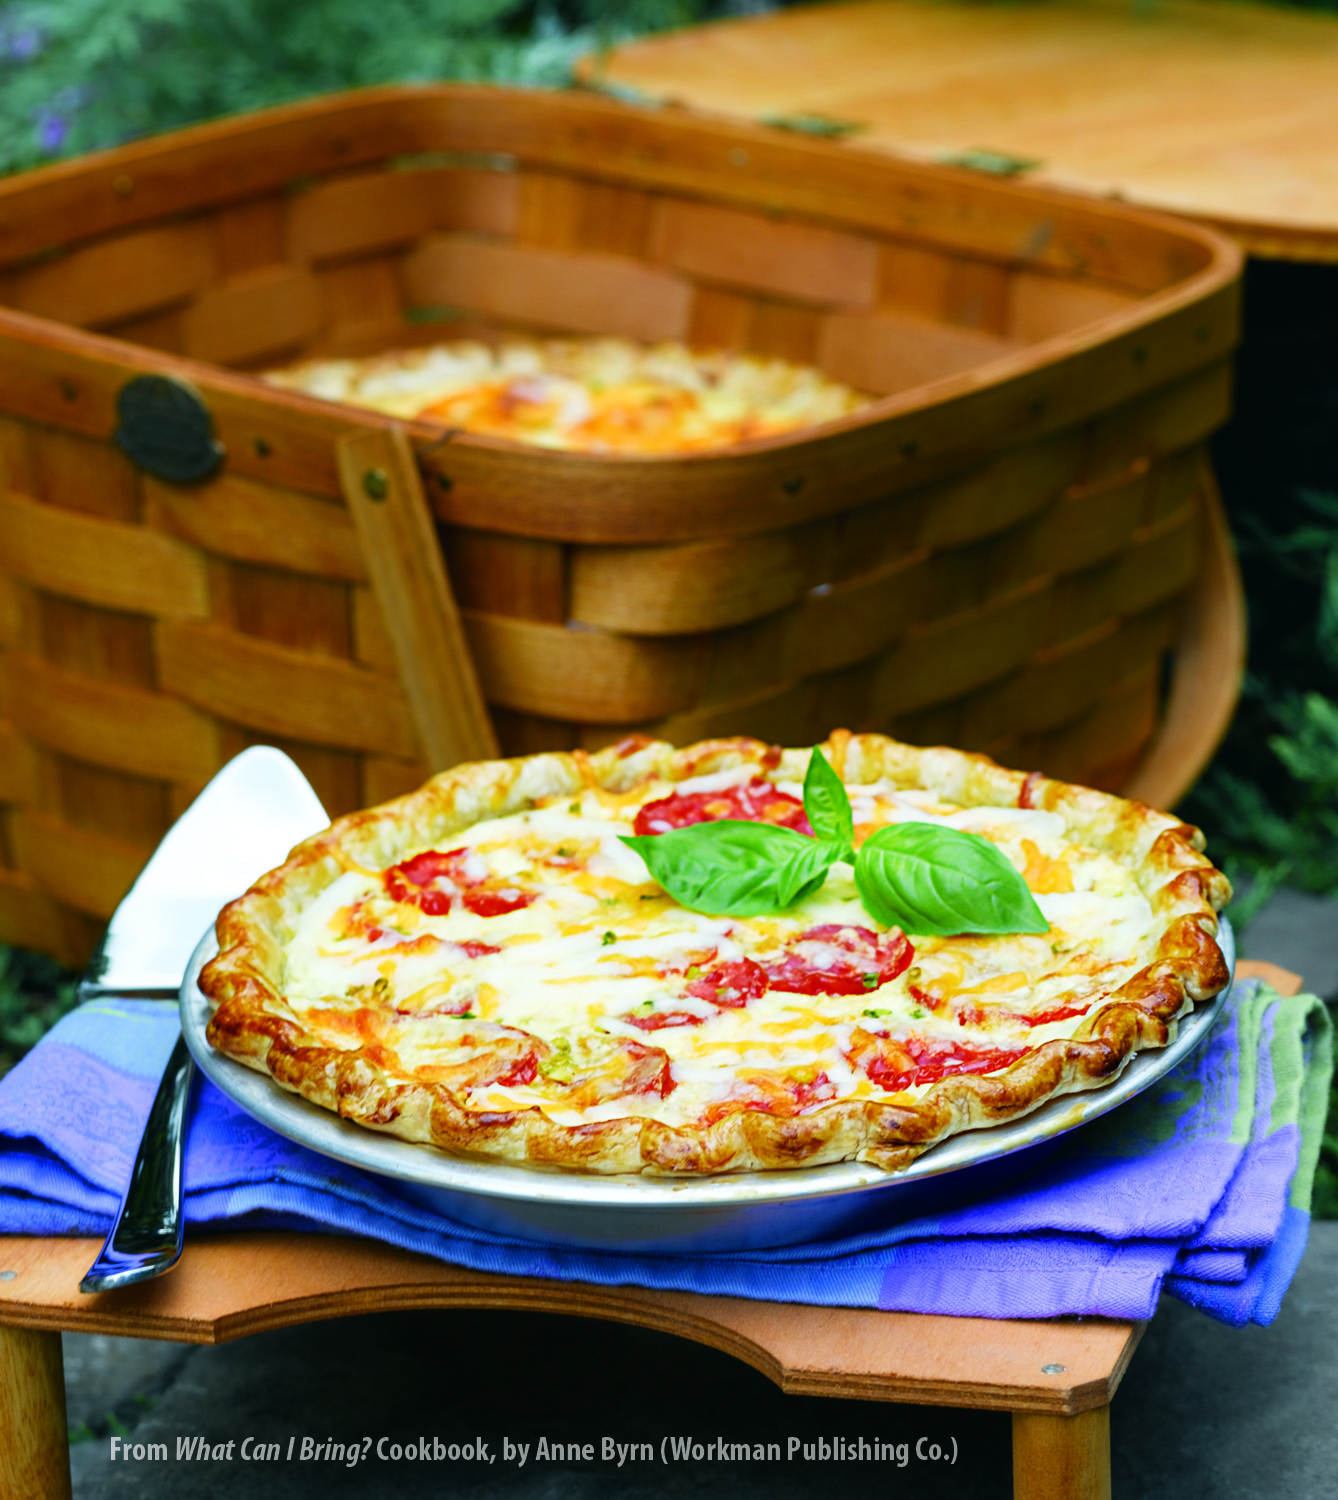
Homegrown Tomato Pie

Homegrown Tomato Pie

Fresh Tomato Pie photo.jpg

When summer’s ripe tomatoes come into season, I love to bake tomato pie.

Piled into a pie crust and topped with seasonings and cheese, tomato pie is the perfect appetizer, lunch, or dinner. It is today’s new quiche, a vibrantly flavored and colored one-pan meal. And just by doing something a simple a changing up the type of tomatoes, changes the look and feel of the pie.

For making the perfect tomato pie, first use the best tomatoes you can find. Use fresh basil, and if you love bacon, by all means, add it. This is a blueprint recipe I have used through the years, so feel free to change it up depending on what’s in your garden and pantry.

And just because it’s called a tomato pie, doesn’t mean you can make this recipe into smaller tarts or larger sheet pan pies. It’s super versatile, involving just a crust, tomato slices, filling, and your imagination!


HOMEGROWN TOMATO PIE RECIPE:
Makes: 6 to 8 servings | Prep: 25 minutes | Bake: 50 to 55 minutes

3 medium-size ripe tomatoes, peeled and cut into 15 to 16 slices
Kosher salt
1 pie crust (9 inches), thawed if frozen
1/2 cup torn fresh basil leaves
1/2 cup chopped green onions
1 cup (4 ounces) shredded mozzarella cheese
1/2 cup (2 ounces) shredded Cheddar cheese
3 tablespoons mayonnaise
Dash cayenne pepper

  1. Place a rack in the center of the oven and preheat the oven to 375 degrees F.

  2. Place the tomato slices on a baking rack placed over a sheet pan. Lightly salt the tomatoes and let them sit until they give up some of their juice, about 15 minutes.

  3. Prick the bottom and sides of the pie crust with a fork a few times. Bake the crust until it begins to brown, about 5 minutes. Let the crust cool for about 15 minutes. Leave the oven on.

  4. Pat the tomato slices dry with paper towels. When the crust has cooled, arrange half of the tomato slices in the bottom. Scatter half of the basil and green onions over them. Add the rest of the tomato slices and top with the remaining basil and green onions.

  5. Combine the mozzarella and Cheddar, mayonnaise, and cayenne in a small bowl. Spoon this mixture over the tomatoes and spread it out as evenly as you can.

  6. Bake the tomato pie until the crust has lightly browned, 30 to 35 minutes. Tent the top with a piece of foil to prevent overbrowning. Continue baking until the filling firms up, 10 to 15 minutes more. Remove from the oven and let cool 20 minutes before slicing.