Mains

Shellie's Spaghetti Carbonara

Shellie's Spaghetti Carbonara.jpg

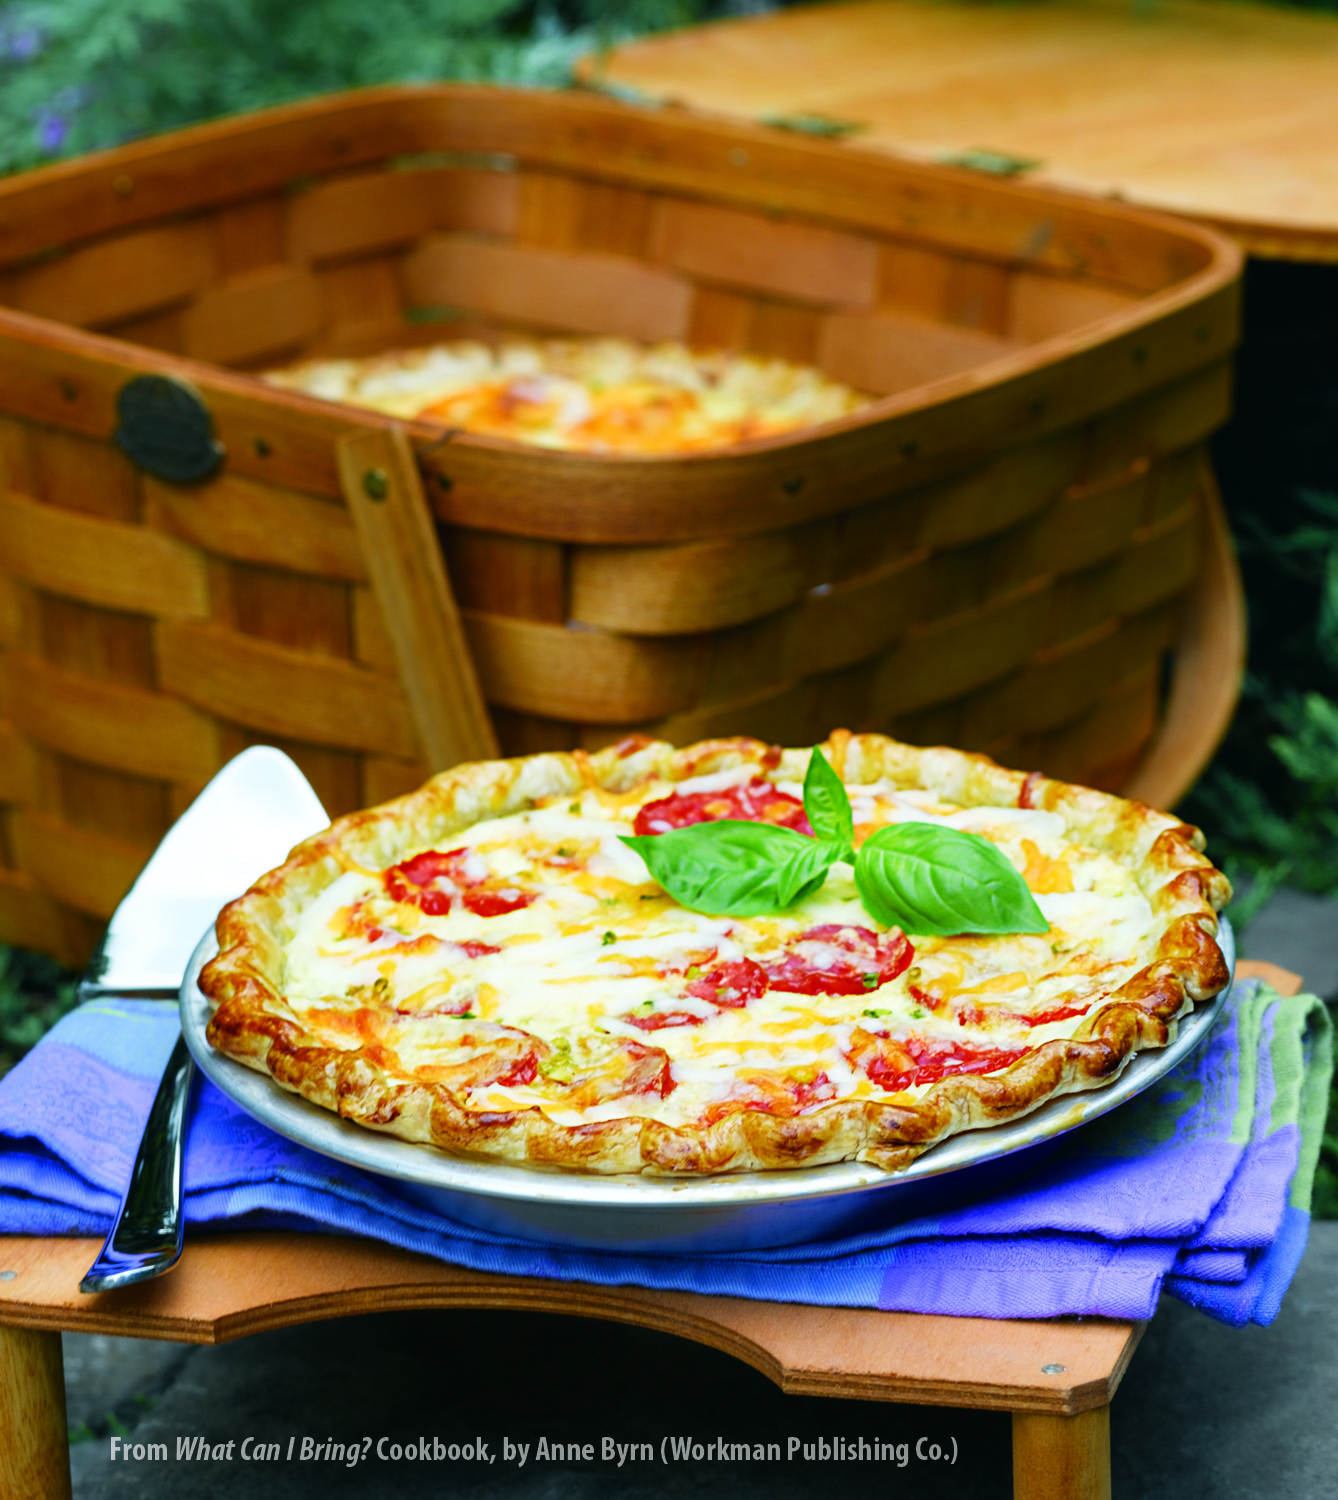
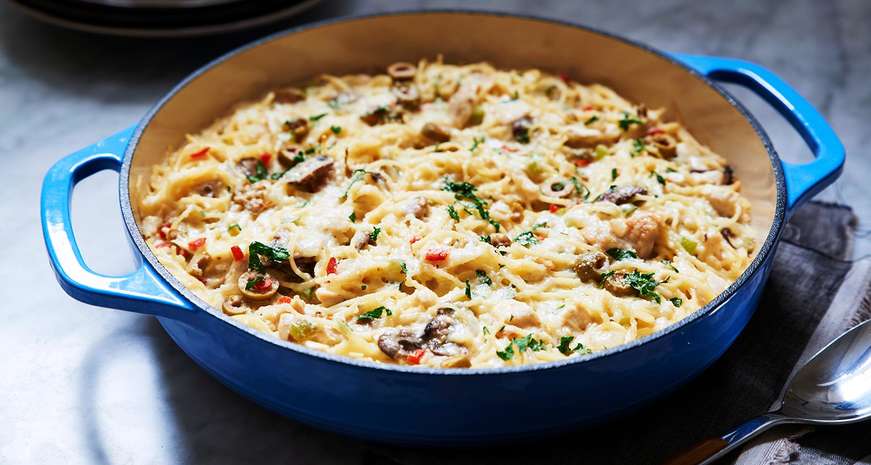
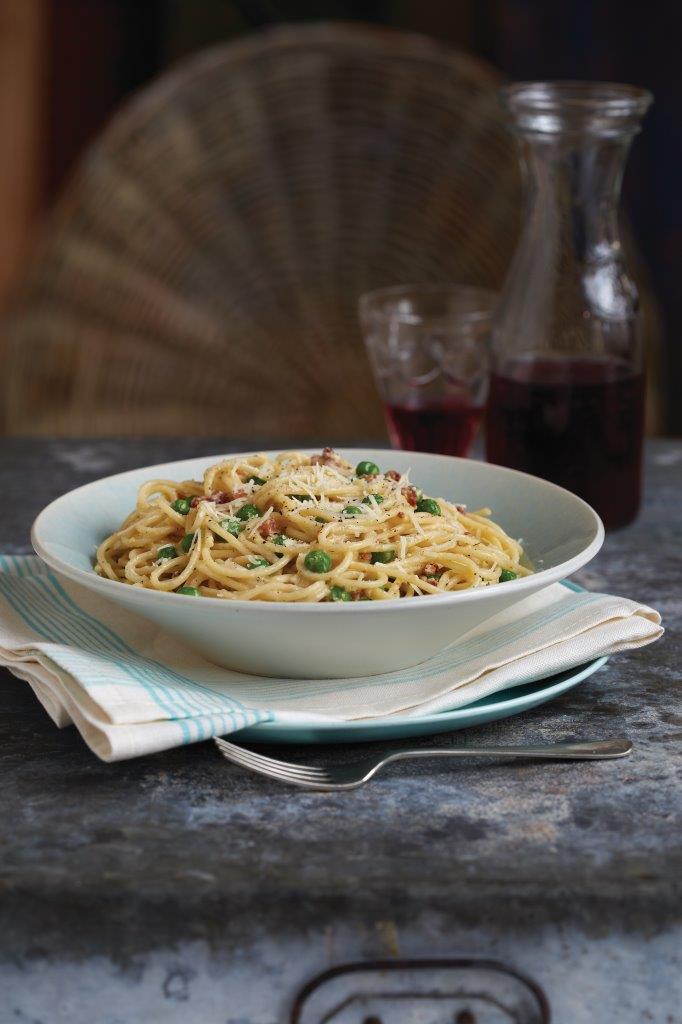
Shellie’s Spaghetti Carbonara

My high school friend Shellie Unger is a fabulous cook. I remember her mother growing fresh herbs and preserving fruit in brandy during those stodgy casserole years of the South when few cooks prepared food that was out of the ordinary. Shellie took her mother’s creativity in the kitchen and added her own flourishes and practicality from working for years as an executive for Vanguard, raising two children, and traveling with her family.

Shellie says her go-to recipe that her kids request when they come home to Pennsylvania to visit or when she needs to impress friends quickly is her Spaghetti Carbonara. She studied various recipes, then perfected her own. On a trip to London she and her son Trey ordered this as a brunch appetizer and baby peas were added, so now she adds peas.  Shellie says this recipe originated in the coal-mining region of Italy.

Pancetta is Italian bacon, and you can find it at delis that specialize in Italian ingredients. Or you can use thick-sliced bacon. Shellie and I both agree to splurge on the good Parmesan cheese, using Parmigiana-Reggiano or grana.

SHELLIE’S SPAGHETTI CARBONARA RECIPE:

Makes: 4 servings | Prep: 15 to 20 minutes | Cook: 7 to 8 minutes

 6 quarts water
2 tablespoons salt
2 tablespoons olive oil or butter (or combination of the two)
6 to 8 ounces pancetta, chopped
2 cloves garlic, peeled and left whole
1 pound spaghetti
4 large eggs, at room temperature
1¼ cups grated good Parmesan cheese, (see Notes)
Freshly ground black pepper to taste
½ to ¾ cup frozen baby peas, thawed
Reserved ¼ cup pasta water 

  1. Bring the 6 quarts water to a boil in a large pot, and add the salt.

  2. Meanwhile, place the olive oil or butter in a large skillet with pancetta and whole garlic cloves. Cook over medium-high heat until the pancetta renders its fat but is not crisp, 3 to 4 minutes. Discard the garlic cloves and remove the pan from the heat. Do not drain the fat.

  3. When the water is boiling, add the pasta, and stir to separate the spaghetti. Lower the heat to medium, and let the pasta cook at a simmer until al dente, 6 to 7 minutes.

  4. While the pasta cooks, break the eggs into a large shallow bowl. Whisk until the yolks and whites are just combined. Add 1 cup of the Parmesan, the cooled pancetta and drippings, and a generous grinding of black pepper.

  5. When the pasta has cooked, drain the pasta (reserving ¼ cup pasta cooking water) and turn it into the bowl with the egg mixture. Toss until the egg sauce cooks and the pasta is well coated. Add the reserved pasta water as needed so the strands of spaghetti do not stick together. Fold in the peas.

  6. Serve at once with the extra Parmesan for topping.


Do ahead: While this is a last-minute recipe, you can pre-chop the pancetta and place it back in the fridge, peel the garlic cloves, thaw the peas, and grate the Parmesan. If you want to reheat leftovers, save a little extra pasta cooking water to pour over the top.


Shrimp and Cheese Grits

Shrimp and Cheese Grits

Shrimp and Grits | Anne Byrn

There are as many ways to cook shrimp and grits as there are ways to roast a chicken. Which is why I love this recipe so much - you can leave your mark on it, make it your own just by doing something so simple as adding mushrooms, or using green onions and not white, or by lightly frying the shrimp first as is done in this wonderful version. Plus, the grits can simply be seasoned with butter or as we prefer with cheddar and garlic. This is the recipe my daughter wanted me to make for her 18th birthday party with friends. It is inspired from the first shrimp and grits I ever tasted in Charleston, S.C. With a big Caesar salad and birthday cake for dessert, the meal was simple, elegant, friendly, and fun.

Since then, I’ve made shrimp and grits even more ways, most recently in a cast-iron skillet. I simmer the grits until done in a saute of onion and peppers, add the cheese, then nestle in peeled, deveined raw shrimp and place the skillet in the oven. The shrimp poach in the warm grits, and the flavor is fabulous!


SHRIMP AND CHEESE GRITS RECIPE:

Makes 6 servings | Prep: 25 to 30 minutes | Cook: 10 to 15 minutes

1 1/2 pounds large shrimp, peeled and deveined
Salt and freshly ground black pepper to taste
2 tablespoons all-purpose flour
1/4 cup olive oil or vegetable oil
2 tablespoons butter
1 cup sliced mushrooms
1/2 cup sliced red bell pepper
2 to 3 cloves garlic, sliced
1/3 cup chopped green onion
1 cup chopped fresh tomato
1/2 cup chicken broth
1 tablespoon fresh lemon juice
Dash hot pepper or Worcestershire sauce
Chopped parsley or green onions, for garnish
Cheese Grits (see recipe)

  1. Place the shrimp in a small bowl and season with salt and pepper and toss with the flour. Set aside.

  2. Place the oil in a cast iron or other large skillet and heat over medium-high, and when hot add the shrimp a few at a time, and cook through, 1 to 2 minutes per batch. Remove to a plate and continue until the rest of the shrimp have cooked.

  3. Place the butter in the skillet over medium heat, and add the mushrooms, red pepper, garlic, and green onion. Cook, stirring until the mushrooms and peppers are soft, 5 to 6 minutes. Add the tomatoes, chicken broth, lemon juice and hot sauce or Worcestershire sauce. Add the shrimp and their cooking juices back to the pan. Stir and cook over medium-high heat until the tomatoes cook out some of their liquid, and the shrimp cook all the way through, 2 to 3 minutes. Spoon shrimp over grits, and garnish with chopped parsley or green onions.


How to Make Cheese Grits: Follow cooking directions on the box or bag of grits. However, do not cook the grits in all water. Cook in half water and half milk. And add 1 to 2 cloves minced garlic to the cooking water, as well as salt and pepper. When the grits have cooked per instructions, add a tablespoon butter and a handful (1 cup) shredded mild cheddar cheese or a Manchego cheese. Taste for seasoning. Add more butter and cheese, if desired.

Homegrown Tomato Pie

Homegrown Tomato Pie

Fresh Tomato Pie photo.jpg

When summer’s ripe tomatoes come into season, I love to bake tomato pie.

Piled into a pie crust and topped with seasonings and cheese, tomato pie is the perfect appetizer, lunch, or dinner. It is today’s new quiche, a vibrantly flavored and colored one-pan meal. And just by doing something a simple a changing up the type of tomatoes, changes the look and feel of the pie.

For making the perfect tomato pie, first use the best tomatoes you can find. Use fresh basil, and if you love bacon, by all means, add it. This is a blueprint recipe I have used through the years, so feel free to change it up depending on what’s in your garden and pantry.

And just because it’s called a tomato pie, doesn’t mean you can make this recipe into smaller tarts or larger sheet pan pies. It’s super versatile, involving just a crust, tomato slices, filling, and your imagination!


HOMEGROWN TOMATO PIE RECIPE:
Makes: 6 to 8 servings | Prep: 25 minutes | Bake: 50 to 55 minutes

3 medium-size ripe tomatoes, peeled and cut into 15 to 16 slices
Kosher salt
1 pie crust (9 inches), thawed if frozen
1/2 cup torn fresh basil leaves
1/2 cup chopped green onions
1 cup (4 ounces) shredded mozzarella cheese
1/2 cup (2 ounces) shredded Cheddar cheese
3 tablespoons mayonnaise
Dash cayenne pepper

  1. Place a rack in the center of the oven and preheat the oven to 375 degrees F.

  2. Place the tomato slices on a baking rack placed over a sheet pan. Lightly salt the tomatoes and let them sit until they give up some of their juice, about 15 minutes.

  3. Prick the bottom and sides of the pie crust with a fork a few times. Bake the crust until it begins to brown, about 5 minutes. Let the crust cool for about 15 minutes. Leave the oven on.

  4. Pat the tomato slices dry with paper towels. When the crust has cooled, arrange half of the tomato slices in the bottom. Scatter half of the basil and green onions over them. Add the rest of the tomato slices and top with the remaining basil and green onions.

  5. Combine the mozzarella and Cheddar, mayonnaise, and cayenne in a small bowl. Spoon this mixture over the tomatoes and spread it out as evenly as you can.

  6. Bake the tomato pie until the crust has lightly browned, 30 to 35 minutes. Tent the top with a piece of foil to prevent overbrowning. Continue baking until the filling firms up, 10 to 15 minutes more. Remove from the oven and let cool 20 minutes before slicing.

Grilled Chicken for a Crowd

Grilled Chicken for a Crowd

grilled_chicken_012.JPG

My favorite way of grilling chicken for company is the "spatchcock" method of grilling chicken, which is to cut out the backbone of a whole chicken and lay the chicken out flat like you have opened up a book. Then, the chicken can be marinated or seasoned as you like. It can be cooked over indirect heat, covered, until cooked through, and then it can be moved to direct heat to cook until crispy, browned, and flavorful.

The easiest and best marinade is oil and vinegar, plus seasonings, or if you are in a pinch, bottled vinaigrette or Caesar dressing. Place the spatchcock chicken in a large plastic bag and pour in a vinaigrette or bottle of the dressing. If you have lemons, cut a lemon in half (one per bag) and squeeze the juice into the bag. Place the two lemon halves in the bag with the marinating chicken. Seal the bags and place these bags in the fridge overnight. You can chill them two nights if you like for even more flavor. And once you are ready to cook, drain the pieces and cook over medium-hot fire until seared, then turn, and cook on the second side until seared and the chicken is cooked through. This will take 4 to 5 minutes per side, depending on the heat. The flatter you pound the chicken, the faster it will cook. Transfer the cooked chicken to a clean platter and surround with slices of lemon and good olives and make room for a side of orzo or basmati rice or taboulleh, some sort of grain that mingles well with the juices from the chicken.

Serve it with cole slaw, roasted sweet potatoes, fresh cranberry sauce, and some braised kale or collards. It's delicious, foolproof, and best of all, tested many years on my own family!


GRILLED CHICKEN FOR A CROWD RECIPE:
Makes: 6 servings | Prep: 20 minutes | Marinate: 6 hours | Cook: 1 1/2 hours

1 whole 3- to-3 1/2-pound chicken

Marinade:
2 medium lemons
1 tablespoon Worcestershire sauce
4 cloves minced garlic
1/2 teaspoon salt
1/4 teaspoon coarsely ground black pepper
2 tablespoons fresh rosemary leaves
1 tablespoon fresh thyme leaves
1/3 cup olive oil

  1. Rinse the chicken inside and out, and pat it dry with paper towels. Place it breast side-down on a cutting board and cut out the backbone using a sharp knife or poultry shears. To do this, cut on both sides of the backbone, and discard the bone.

  2. Turn the chicken over to breast side-up, and press down on the breastbone with your hands or a cast iron skillet until the bone cracks and the chicken flattens slightly. Place the chicken in a large zipper-lock bag or in a glass casserole dish.

  3. For the marinade, cut the lemons into halves and squeeze the juice into a medium-size mixing bowl. Stir in the Worcestershire sauce, garlic, salt, pepper, rosemary, and thyme. Whisk in the olive oil until the mixture pulls together and is thickened. Pour the marinade over the chicken in the bag. Zip the bag to secure it, and massage the chicken from the outside of the bag in order to coat it well with the marinade. Place the bag in the refrigerator at least 6 hours, preferably overnight.

  4. When you are ready to grill, start the gas grill to medium-high on one side of the grill and low heat on the other. Or, if using charcoal, place the coals on one side of the grill, and light and let cook down to medium-high. Clean the grates of the grill with a wire brush.

  5. Remove the chicken from the marinade and place skin-side up on the indirect or lower heat side of the grill. The grill should register 325 degrees when covered. Cover and cook until a thermometer inserted in the thickest part of the thigh registers 165 degrees, about 1 hour, 15 minutes. Now, you will cook the chicken on the direct side of the grill to crisp up and brown. Distribute the coals under the chicken as needed. Place the chicken skin-side down over the direct heat, and cook about 8 to 10 minutes, or until well browned. Turn and let cook and brown on the other side. Remove from the heat, let rest 20 minutes, then cut into pieces and serve with your favorite sauce.

Mom's Chicken Tetrazzini

Mom’s Chicken Tetrazzini

IMG_6923.JPG

Nothing says comfort better than Chicken Tetrazzini. In my childhood home, ours was made from a freshly stewed hen, the meat carefully pulled from the bones and shredded, then tossed with warm vermicelli, a Parmesan cream sauce, and baked until bubbling around the edges. It was company fare or maybe served on your birthday if you asked nicely.

Just the sound of the word "Tetrazzinii" evoked glamour and sophistication in what didn't feel like a very sophisticated South. The story for this recipe goes that it was named for Italian opera soprano Luisa Tetrazzini in the early 1900s. She was known as the "Florentine Nightingale" of music and visited America on tour. Her wildly popular, open-air concerts in New York and San Francisco attracted thousands of devoted fans. And either at the old Knickerbocker Hotel in New York or the Palace Hotel in San Francisco - it is still debated which was the originator - the chef is said to have created chicken and cream sauce atop pasta in honor of Tetrazzini's visit. Chefs often named dishes on their menus after celebrities. And from that day on, the comforting chicken casserole with the Italian name would become a part of the American home recipe box and morph into the recipe we know and love today.

A crowd pleaser, Tetrazzini can be made with either chicken or turkey. You can cook the chicken the old-fashioned way, by simmering a whole chicken or hen (slightly larger, better flavor) in water flavored with onion and bay leaves, salt, and pepper, until done. Let the chicken cool, then remove the meat from the bone, and reserve about three cups of it.

Or, use leftover roasted turkey. That's when I love to make Tetrazzini — after Thanksgiving or Christmas — and I stash it in the freezer to heat up for dinner in the cold-weather months ahead. Chicken seems to be the original ingredient over turkey, but it doesn't really matter. The real star is the sauce.

That's what pulls the ingredients together — a simple white sauce, made by melting butter, stirring in flour, and then whisking in chicken broth and cream. You create what the French call a bechamel, or most home cooks call a white sauce. And when you add grated Parmesan, salt, pepper, and a dash of sherry, you might as well call it heaven.


MOM’S CHICKEN TETRAZZINI RECIPE:

Makes 8 to 10 servings | Prep: 30 minutes | Bake: 25 to 30 minutes

8 ounces thin spaghetti or vermicelli
Salt
3 cups (12 ounces) chopped or shredded cooked chicken
4 tablespoons butter
2 cups (8 ounces) sliced mushrooms
1/2 cup chopped onion
1/2 cup chopped celery
3 tablespoons all-purpose flour
2 cups low-sodium chicken broth
1 cup heavy (whipping) cream
2 tablespoons sherry
Freshly ground black pepper
1 cup (4 ounces) grated Parmesan cheese, divided use
1/4 cup sliced green olives
1/4 cup (or more as desired) chopped toasted pecans, for garnish

  1. Bring a large pot of water to a boil over high heat. Break the spaghetti noodles in half. Stir in the spaghetti and 1 teaspoon salt. Reduce the heat to medium-high, and cook the spaghetti, uncovered, according to package directions until just done, 6 to 7 minutes. Drain the spaghetti well in a colander, shaking it to remove excess water. Place it in a mixing bowl, add the chicken, and toss to combine. Set aside.

  2. Place a rack in the center of the oven, and preheat the oven to 375 degrees.

  3. Place the butter in a large skillet over medium heat. When melted, add the mushrooms, onion, and celery and cook, stirring, until soft, 3 to 4 minutes. Reduce the heat to medium-low, and add the flour. Cook, stirring, for 1 minute. Add the chicken broth and cook, stirring, until it begins to thicken, 1 to 2 minutes. Add the cream, and stir until combined. Add the sherry, season with salt and pepper to taste, and cook stirring until the sauce comes just to a boil, about 2 minutes. Remove the pan from the heat and stir in 1/2 cup of the Parmesan and olives. Pour the sauce into the bowl with the chicken and noodles and stir to combine well.

  4. Transfer the chicken mixture to a 13- by 9-inch or large round ceramic or glass casserole dish. Sprinkle with the remaining 1/2 cup Parmesan. Bake the casserole until it is bubbling, about 25 to 30 minutes. Remove from the oven, let it rest 10 minutes, then scatter with the toasted pecans and serve.

My Baked Chicken and Rice

My Baked Chicken and Rice

My Chicken and Rice.jpg

When simple recipes have simple ingredients, the secret to success is to choose the best ingredients. Word to the wise - something this basic must start with a good chicken! For the comforting, and oh-so-easy baked chicken with rice, I like a small organic chicken, which are much easier to find in the supermarket that they used to be. I don’t know why there is controversy on how to prep a chicken for cooking, but my mother always rinsed the inside well with cold water, and she even soaked her chickens in salted (brined) water before roasting or frying.

I take a little easier road these days and just rinse them well, but then I will cut out the backbone with poultry shears and clean the interior well to make sure there are no bits of organ meat left from processing. Any good heavy Dutch oven, cast iron skillet with lid, or nice copper casserole dish and foil works. A slow cooker would also work but you will not get any browning, although more juices will cook out of the chicken and produce more stock. Suit yourself! Add mushrooms if you like or just keep it plan and simple. 


 MY BAKED CHICKEN AND RICE RECIPE:

Serves: 4 | Prep: 10 minutes | Soak: 30 minutes | Bake: 2 hours

One 3-to 4-pound whole organic chicken, rinsed 
2 tablespoons vegetable oil
Sea salt and freshly ground black pepper 
1 medium onion
2 bay leaves
½ cup water or white wine
3/4 cup long-grain white rice, such as Basmati
1 cup water
Chopped Italian parsley, for garnish

  1. Place a rack in the center of the oven, and preheat the oven to 300 degrees.

  2. With poultry shears cut the backbone out of the chicken and discard. Trim off the thigh and leg portions, keeping the thigh and leg in one piece. Keep the double breast with ribs and wings in one piece. Pat chicken dry with paper towels.

  3. Place 2 tablespoons vegetable oil in a heavy Dutch oven over medium-high heat. When the oil is hot, add the chicken pieces, skin-side down. Let sear until they are golden brown, 2 to 3 minutes, then with tongs turn to the other sides, and brown them all over. You may need to reduce the heat to medium if the pan gets too hot. Turn off the heat and season the seared chicken with salt and pepper.Discard extra grease in the pan.

  4. Meanwhile, peel the onion and cut into quarters. Tuck the onion around the chicken. Add the bay leaves. Add ½ cup water or white wine to the pan, and place the lid on the pan. Place the pan in the oven to cook until the chicken is very tender, 1½ hours.

  5. Remove the pan from the oven, and leave the oven on. Remove the pan lid, and sprinkle the raw rice around the chicken. Pour the water over the rice, and stir with a fork to moisten the rice with pan juices. Place the lid back on the pan. Return the pan to the oven so the rice can cook, 20 minutes more.

  6. To serve, carefully remove the chicken to a platter to keep warm. Spoon the rice alongside, and scatter chopped parsley over the top.

Gluten-Free Fried Chicken

Gluten-Free Fried Chicken

80CA09DA-CB41-4A3C-A0FD-0F218D788B3D.JPG

In the years since I wrote my first gluten-free cookbook, Unbelievably Gluten-Free, there are so many more ingredients available that make the process of cooking without gluten easier. I wrote the book because many readers begged me to share easy, accessible, home-style gluten-free recipes. So, I started experimenting and found that you really can create gluten-free recipes the whole family will enjoy. It just takes the right ingredients and a bit of trial and error..

Take fried chicken, for example. You make it exactly as you would if done the old-fashioned way, dredged in seasoned flour, except you use a gluten-free flour blend, found everywhere. For the best fried chicken of any sort, either soak the chicken in buttermilk or salted water before dredging. Allow the chicken pieces to rest after dredging and before frying. And use a good, fresh oil for frying - I prefer peanut oil.

That’s it! Oh, and be generous with the salt and pepper in seasoning your flour blend. No one likes bland fried chicken. Plus, drain on brown paper and not paper towels, because the paper keeps the chicken crispy.


GLUTEN-FREE FRIED CHICKEN RECIPE:

Serves: 6 | Prep: 10 minutes | Cook: 30 to 35 minutes

1 chicken (2 1/2 to 3 pounds), cut into 8 pieces
2 cups buttermilk or salted ice water
1 cup gluten-free flour
Salt, freshly ground black pepper, and seasoned salt
6 cups (48 ounces) peanut or vegetable oil, for frying

  1. Rinse the chicken pieces under cold running water and pat them dry with paper towels. Place the chicken in a glass or stainless steel bowl and pour the buttermilk or salted ice water over the chicken to cover it. Cover the bowl with plastic wrap and place it in the fridge to chill for at least 1 hour.

  2. Remove the chicken from the buttermilk or ice water and pat it dry. Place the gluten-free flour in a brown paper bag, and season it generously with salt, pepper, and seasoned salt. Shake to combine the flour and seasonings. Add a few pieces of chicken to the flour and toss or shake to coat it well. Repeat with the remaining chicken. Place them on a rack to dry out slightly while the oil heats.

  3. Heat the oil to a depth of 2 inches in a large frying pan over medium-high heat until the oil registered 360 to 375 degrees F on a candy thermometer. Fry the chicken in batches, depending on the size of your skillet, frying only a couple pieces at a time. Place the chicken pieces in the oil, skin-side down, and brown on one side for 5 minutes. Using tongs, turn the pieces over and brown on the other side 5 minutes. Reduce the heat, cover, and let the chicken cook until it has cooked through and has an internal temperature of 170 degrees F measured on an instant-read meat thermometer, about 25 minutes. Remove the cover from the skillet during the last 5 minutes for a crispier crust.

  4. Transfer the chicken to brown paper to drain, then serve warm.

Mexican Lasagna

Mexican Lasagna

Mexican Lasagna Photo.jpg

The simple exchange of corn tortillas for wheat pasta in this lasagna recipe completely transforms this dish. It takes it out of the conventional and makes it feel new. And once you see where this recipe is heading, you can play along, adding fresh corn from your garden or the farmer’s market, for example, and garnishing with cilantro. This recipe calls for conventional tomato sauce but also salsa, as well as chili powder and cumin. And you can make the traditional lasagna filling of ricotta or cottage cheese, but add a little garlic and a sprinkle of oregano to make things more interesting.

Because of the corn tortillas, lasagna is gluten-free. It’s a recipe I shared in my cookbook Unbelievably Gluten-Free. Old meets new in a fresh, authentic way. And did I mention that this is a great do-ahead recipe for parties because you can freeze it, thaw and bake until bubbly?


MEXICAN LASAGNA RECIPE:

Serves: 6 to 8 | Prep: 20 to 25 minutes | Bake: 30 to 35 minutes

Vegetable oil spray, for misting the baking dish
1 pound lean ground beef or turkey
Olive oil, as needed
2 cups fresh corn kernels
1 can (15 ounces) tomato sauce
1 cup tomato salsa
1 tablespoon chili powder
2 teaspoons ground cumin
1 pound ricotta or low-fat, small curd cottage cheese
2 large eggs, lightly beaten
1/4 cup grated Parmesan or crumbled cojito cheese
1 teaspoon dried oregano
1 clove garlic, crushed or minced
12 corn tortillas (8 inches in diameter)
1 cup shredded Monterey Jack, Colby or Cheddar cheese

  1. Place a rack in the center of the oven and preheat the oven to 375 degrees F. Most a 13- by 9-inch baking dish with vegetable oil spray and set it aside.

  2. Crumble the beef or turkey into a large nonstick frying pan, and place it over medium heat. If the meat sticks to the pan, add a little olive oil. Cook, stirring, until the heat is cooked through and browned, 5 to 6 minutes. Drain off the fat. Add the corn, tomato sauce, salsa, chili powder, and cumin. Stir to combine. Let the mixture simmer over medium-low until the flavors come together, 2 to 3 minutes.

  3. Meanwhile, place the ricotta or cottage cheese, eggs, Parmesan or cojita, oregano, and garlic in a medium-size bowl and stir to combine.

  4. To assemble the lasagna, overlap 6 tortillas in the baking dish. Spread half of the meat mixture evenly onto the tortillas. Spoon all of the cheese mixture on top of the meat. Layer the remaining corn tortillas over this, and top with the remaining meat mixture. cover with foil and place in the oven.

  5. Bake until the lasagna heats through, 30 to 35 minutes. Remove the dish from the oven, remove the foil, sprinkle the cheese over the top, replace the foil, and let the lasagna rest on the counter 20 minutes for the cheese to melt. After serving, any leftovers can be reheated at 350 for 20 to 25 minutes.

Smashed Chicken Scallopine

Smashed Chicken Scallopine

sl_scallopine_010.JPG

This recipe has been the mainstay of my kitchen through the years. It was always the most-requested recipe when my children came home from college. And I wonder what it is that makes this recipe so special and memorable. It’s just boneless chicken breasts that have been pounded thin, dredged, then fried. We like to serve it with a topping of a light salad of arugula and fresh tomatoes.

Maybe why everyone remembers it so much is because it was the mid-week meal, the Wednesday or Thursday night dinner on school nights, something everyone loved in spite of different palates. And if we were lucky enough to have leftovers, it made a mean fried chicken sandwich the next day!

To make this recipe you pound chicken breasts with a heavy rolling pin or meat mallet until they are about 1/4-inch thick. Then, we dip them into beaten egg white and press both sides into bread crumbs, either homemade or straight from the panko box. After shallow frying in no more than 1/2-inch of oil in the skillet, these golden chicken cutlets are ready to serve with a fabulous salad of tomatoes and arugula on top. Leftovers - should you be so fortunate to have them - go onto tomorrow’s sandwiches or turn into a quickie chicken Parm with the addition of pasta sauce, Parmesan, and mozzarella, plus a little time in a hot oven.


SMASHED CHICKEN SCALLOPINE RECIPE:

Makes: 4 to 6 servings | Prep: 10 to 15 minutes | Cook: 4 minutes

4 boneless, skinless chicken breast halves
1 egg white
1 cup panko bread crumbs
Salt and freshly ground black pepper to taste
1 large clove garlic, pressed
2 tablespoons grated Parmesan
Pinch dried oregano, if desired
1 cup vegetable oil, for frying

Salad topping:
2 cups arugula leaves
1 cup chopped fresh tomatoes
1/4 cup shaved Parmesan
Pinch of lemon zest
Good olive oil for drizzling
Kosher salt and freshly ground pepper to taste

  1. Place each boneless chicken breast in a gallon-size zipper-lock bag. Pound to 1/4-inch thickness using a meat pounder or heavy rolling pin. Place in the fridge.

  2. Place the egg white in a glass pie plate or wide, shallow dish and beat lightly with a fork. Place the panko, salt and pepper, garlic, Parmesan and oregano, if desired, in a wide, shallow bowl or pie pan.

  3. Place the oil in the skillet over medium-high heat.

  4. Remove the chicken from the fridge. Dip the chicken on both sides in the egg white. Press the chicken into the crumbs to coat both sides. When the oil is hot, slide one cutlet at a time into the hot oil and fry until golden, about 2 minutes, then turn with tongs to the other side and brown for 2 minutes. Remove to a platter to keep warm. Repeat with the remaining chicken, straining the dried bread crumb bits from the oil between batches.

  5. To serve, top each chicken cutlet with a little arugula, chopped fresh tomatoes, Parmesan shavings, lemon zest, olive oil, and salt and pepper to taste.


Think Ahead: Pound the chicken breasts in the plastic bags and then tuck the bags in your freezer until you are ready to cook. These breasts thaw in under 30 minutes, so you can come home, let them thaw while you are getting everything else ready for dinner, then cook.

Caramelized Onion and Gruyere Pizza

Caramelized Onion and Gruyere Pizza

Caramelized Onion and Gruyere Pizza | Skillet Love | Anne Byrn

One of the easiest, most hands-off ways to caramelize onions is in a slow cooker. The onions cook down to a sweet caramel color and you don't have to watch over them in fear of burning. This recipe came from my friend, Atlanta artist Nancy Everett. Make the onions ahead of time and store in your fridge for last-minute pizza cravings. You just add Gruyere and Parmesan cheeses, kalamata olives, and springs of fresh thyme. Cut into little squares for appetizers or bigger squares for dinner!


CARAMELIZED ONION AND GRUYERE PIZZA RECIPE:

Makes: 1 pizza (12 inches) | Prep: 5 minutes | Cook: 10 to 15 minutes | Rest: 5 minutes

Slow-Cooked Caramelized Onions:
3 pounds Vidalia onions, peeled and thinly sliced
8 tablespoons (1 stick) lightly salted butter

For the pizza:
Cornmeal, for prepping the pan
1 pound fresh pizza dough
1 cup Slow-Cooked Caramelized Onions
1 cup shredded Gruyere or ½ cup grated
Parmesan cheese
¼ cup pitted kalamata olives
2 sprigs fresh thyme, roughly chopped or stripped of its leaves
1 tablespoon olive oil
Kosher salt and pepper, to taste

  1. For the onions, place the sliced onions in the bottom of a 4-quart slow cooker. Cut the butter into tablespoons and distribute on top.

  2. Cover and cook on low power for 12 hours, or until the onions are cooked down and a dark rich brown color.

  3. When ready to make pizza, place a rack in the center of the oven, and preheat the oven to 425 degrees F. Sprinkle a dusting of cornmeal over a 12-inch pizza pan and set aside.

  4. Mist your hands with olive oil and press the dough out onto the prepared pan so that it stretches into a 12-inch circle or covers the bottom of the pan. Spoon the onions over the top of the dough, scattering them with your fingers so they are distributed evenly. Sprinkle the cheese over the onions. Scatter the olives and thyme over the top of the cheese. Drizzle the olive oil around the edges of the crust, and sprinkle the crust with salt and pepper. Place the pan in the oven.

  5. Bake until the cheese bubbles and the outside edge of the crust is golden brown, 10 to 15 minutes. Remove the pan and let the pizza rest 5 minutes, then slice and serve.


Note: The onions can be made 4 to 5 days ahead and stored, covered, in the fridge.